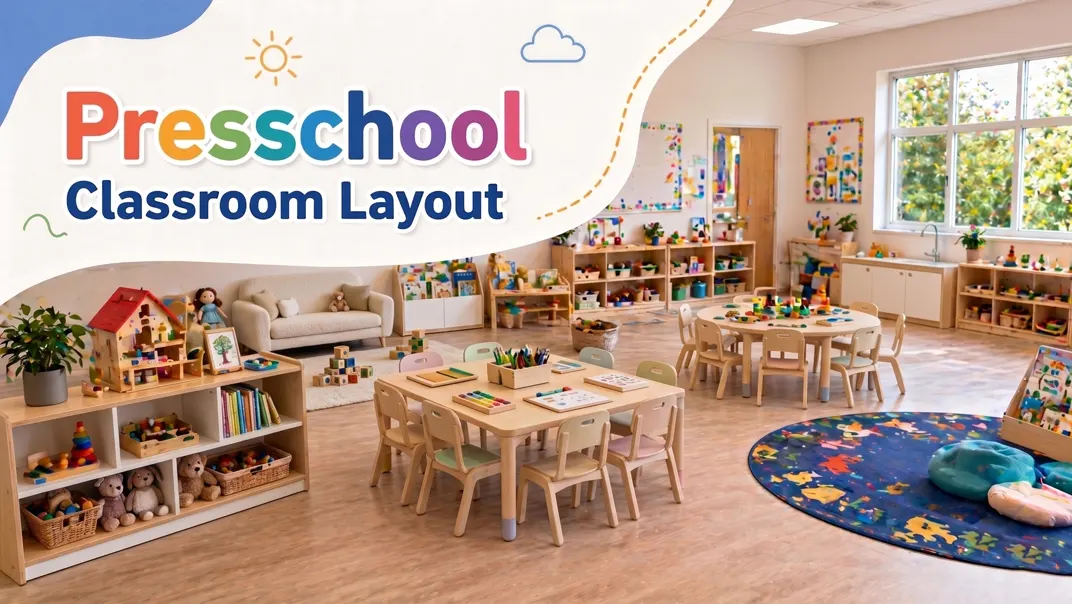
When you plan a preschool classroom layout, you are deciding more than where tables and shelves will stand. You are deciding how children enter, choose materials, move, play, rest, clean up, and work with others—and how easily your teachers can support them. This guide helps you turn a room, a daily routine, and a furniture plan into one functional learning environment.
Start with the room and the children, not a product list. A useful daycare floor plan or classroom sketch should show fixed features, learning zones, storage, supervision points, and the paths people will use all day.
What A Good Preschool Classroom Layout Does
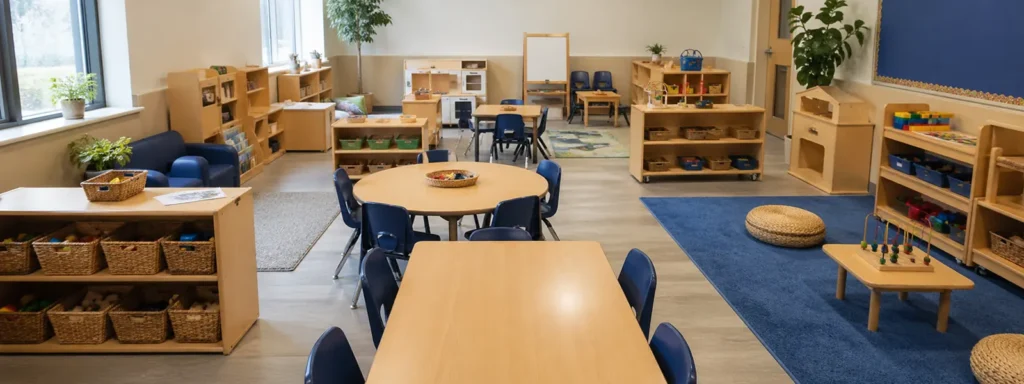
A good layout helps you solve several practical problems at once. Children should know where an activity belongs, teachers should be able to see the room, and materials should be close enough to use without turning every transition into a traffic jam.
- You create recognizable areas without filling the room with barriers.
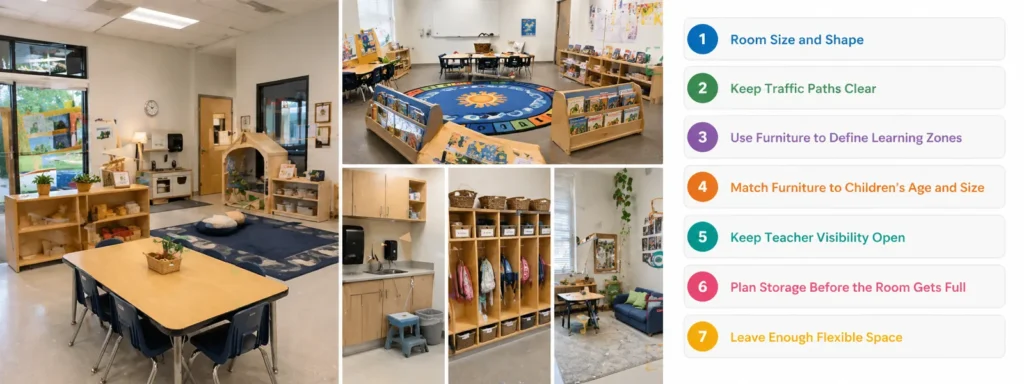
- You keep the main routes between the door, tables, sink, bathroom, storage, and group area clear.
- You separate quiet work from loud or messy play when the room allows it.
- You place materials where children can use and return them with an appropriate level of independence.
- You leave enough flexible space to change from center time to group work, meals, rest, or movement.
Do not judge your plan only when the room is empty. A layout that looks balanced in a drawing can fail when children carry blocks, line up for the sink, or gather around one popular center. Plan for the busiest moments, not just the most attractive view.
Start With The Room
Before you choose furniture, record the conditions that the furniture cannot change. Measure the room and mark the entry door, windows, sink, bathroom access, fixed cabinets, outlets, heating or cooling equipment, columns, and emergency exits. These details determine where you can place art, sensory work, reading, rest, and storage.
Map Your Daily Routine
Write down how the room works from arrival to departure. Include cubby use, circle time, free choice, small-group work, meals, bathroom trips, cleanup, rest, and transitions. Then draw the route for each routine. You will quickly see whether children have to cross the reading area to reach the sink or whether the block center sits in the path from the door to the group space.
Plan For Sightlines And Access
Stand where a teacher normally works and check what can be seen over, around, and between the furniture. Use low shelves to define centers, but keep tall cabinets against a wall or in an adult-only area. You also need clear access for children and adults with different mobility needs. Space, capacity, exit, and accessibility rules vary by location, so confirm the requirements that apply to your program before you finalize the plan.
When you review your drawing, this practical reference on traffic patterns, child-sized furniture, and open teacher sightlines can help you spot problems that are easy to miss from a top-down plan.
Separate Quiet, Active, And Messy Areas
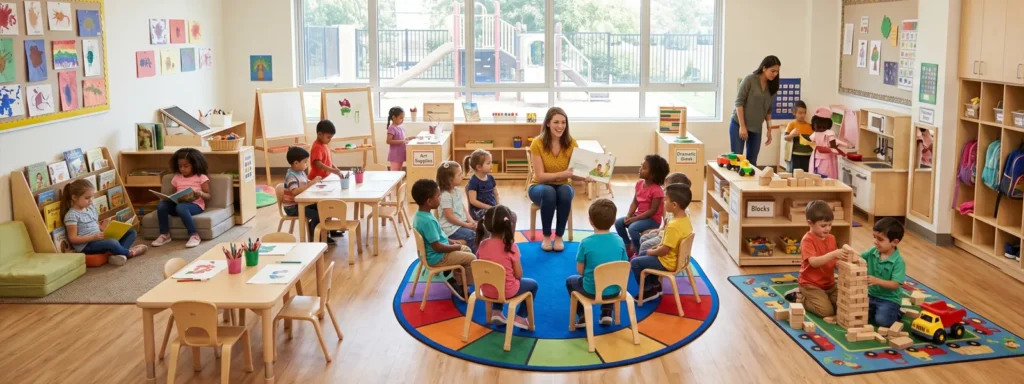
Place areas according to how children use them, not only according to the shape of the room. Reading, calm work, and rest need protection from noise and passing feet. Blocks, dramatic play, music, and movement need room to expand. Art and sensory activities need surfaces, storage, and cleanup access.
- Quiet areas: Keep reading, rest, and focused table work away from the entrance and the loudest centers.
- Active areas: Give blocks, dramatic play, and movement space to operate without taking over the main walkway.
- Messy areas: Place art and sensory work near a sink or easy-clean surface when the room allows it.
- Flexible space: Reserve an open area that can support group meetings, floor work, music, and changing projects.
- Related areas: Keep centers near the materials and routines that support them, such as role-play storage near dramatic play.
You do not need to build every possible center into one room. Choose the areas that match your age group, teaching approach, and available space, then rotate less frequent materials. This reference on choosing and arranging learning centers is useful when you decide which areas deserve permanent floor space and which can share a zone.
Build The Core Learning Areas
Each area needs a clear purpose, a boundary, the right materials, and a realistic amount of room. If an area cannot support the way children will actually use it, combine it with a related area or reduce the materials instead of forcing another large piece of furniture into the classroom.
Circle Time And Group Area
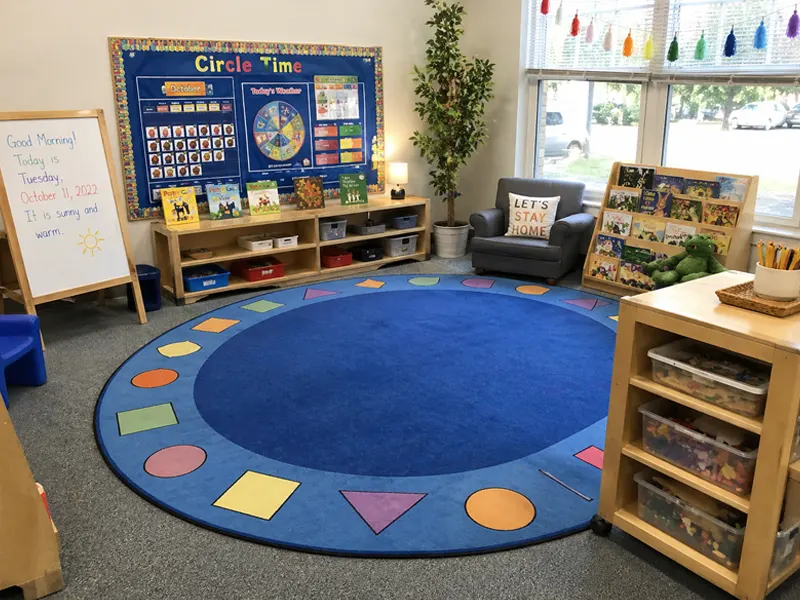
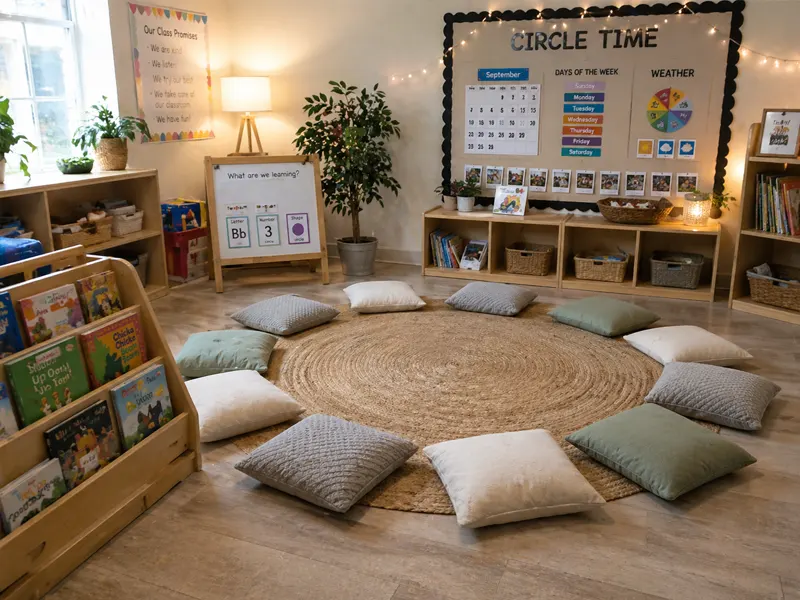
Place the group area where children can gather without crossing through a busy center. A rug can define the space for meetings, stories, music, demonstrations, and movement. Keep enough room around it for children to sit, stand, and leave without pushing into shelves or tables.
- Use a classroom rug or another clear floor boundary.
- Keep displays and teacher resources close, but do not let them block the group’s view.
- Let the same area support flexible floor work when whole-group teaching is finished.
Reading And Quiet Area
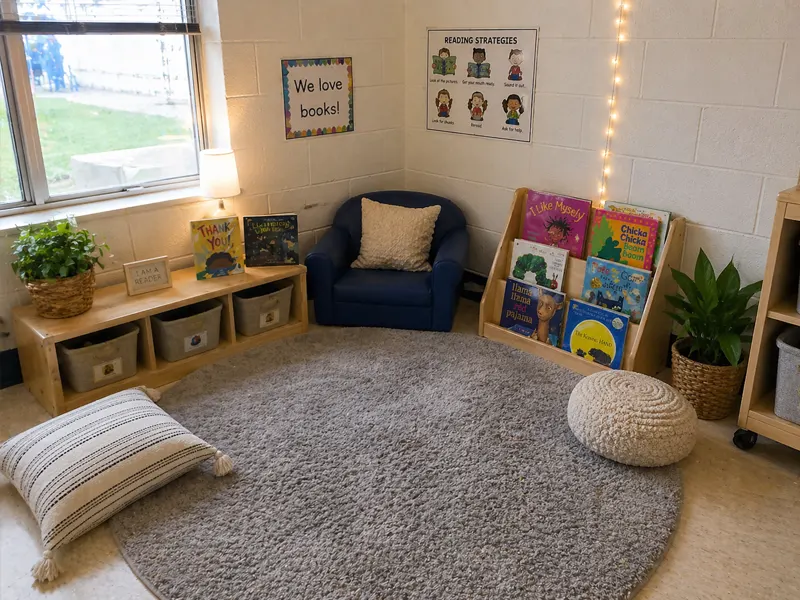
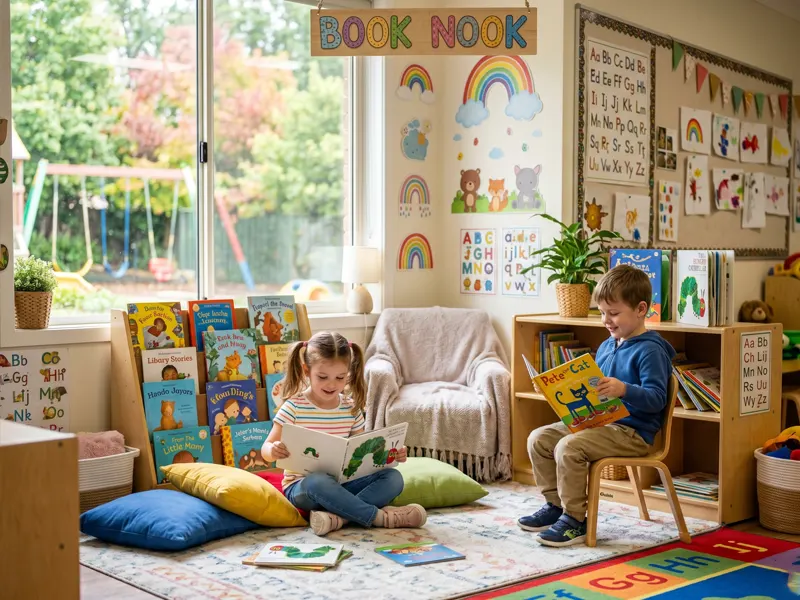
Give reading and quiet work a calm location away from the main entry route, blocks, and dramatic play. Display books so children can see the covers and choose them without asking an adult. A useful classroom reading corner does not need to be large, but it should not be treated as leftover space.
- Use a low book display shelf that does not create a blind corner.
- Provide a comfortable seat or soft floor area with enough room for one child or a small group.
- Keep the visible selection manageable and rotate books instead of overcrowding the shelf.
Art Area
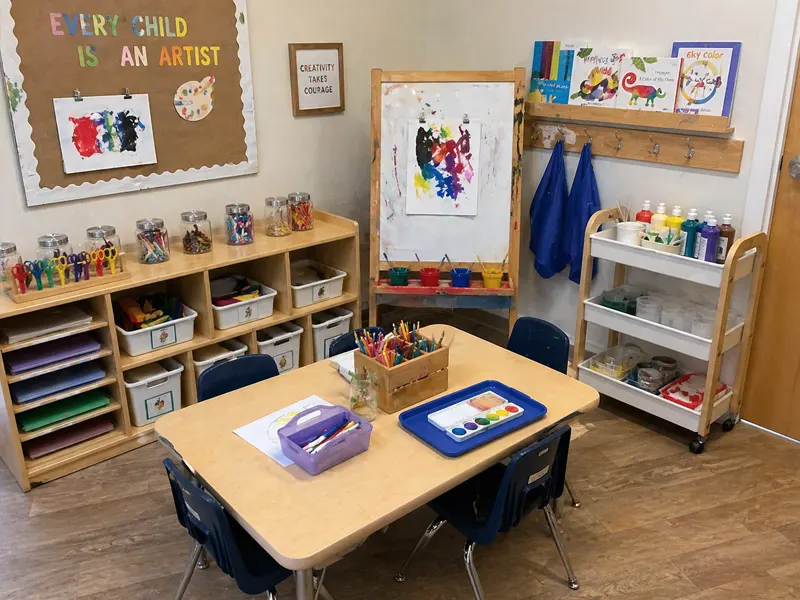
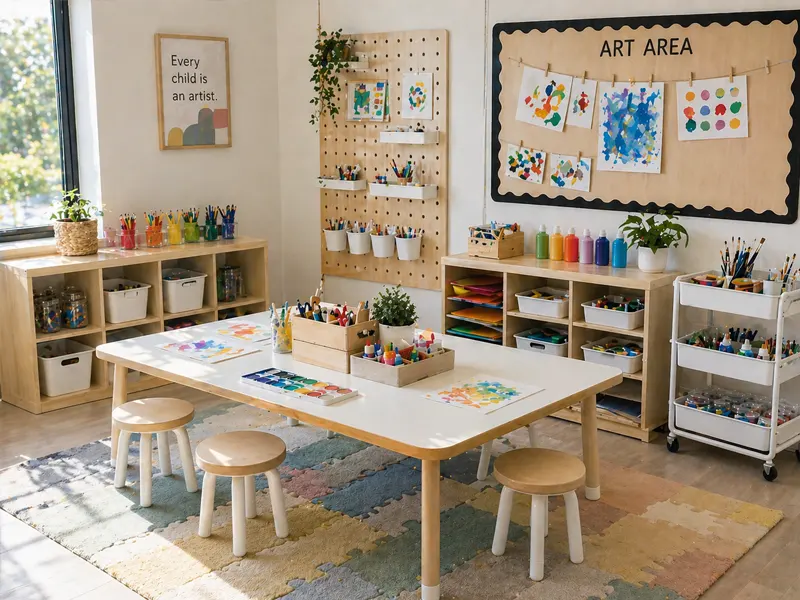
Plan the art area around the full activity, not just the table. You need a work surface, seating, material storage, drying space, cleanup access, and enough room for children to carry work safely. Place the area near a sink or easy-clean floor when possible, and keep extra supplies separate from the materials children use every day.
Choose easy-clean tables and preschool chairs that match the children’s size. The exact material, finish, and construction should be confirmed against your use, cleaning routine, and project requirements rather than selected from a generic checklist.
Block And Construction Area
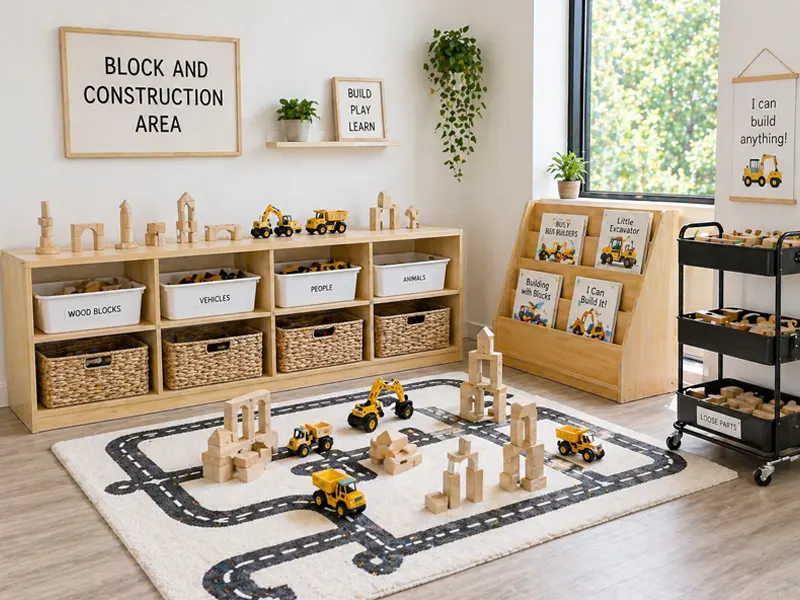
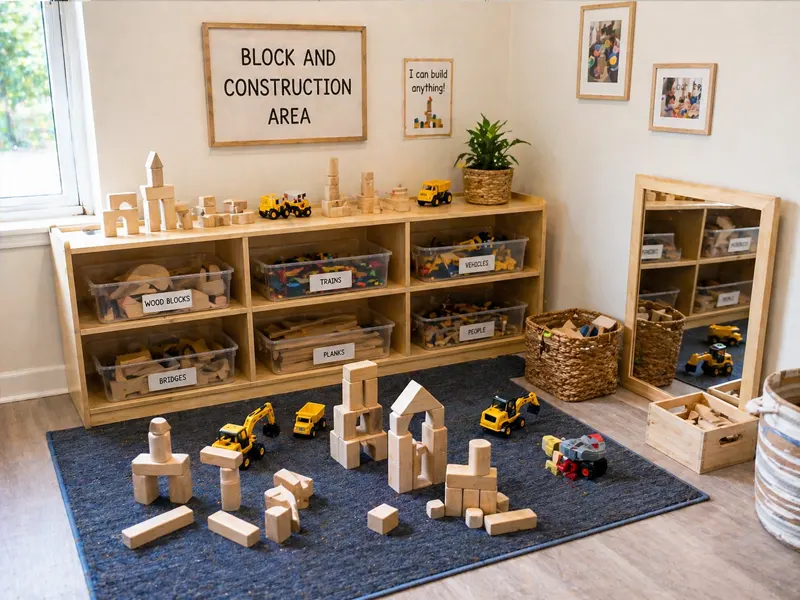
Give blocks a protected floor area where children can build without people walking through the work. A corner or wall area often works well. Keep the shelf close enough for children to return materials, but leave room for structures to stay in place while they work.
If the block center sits in a main walkway, children have to defend their work from traffic. That creates conflict and cleanup problems that the right placement could have prevented.
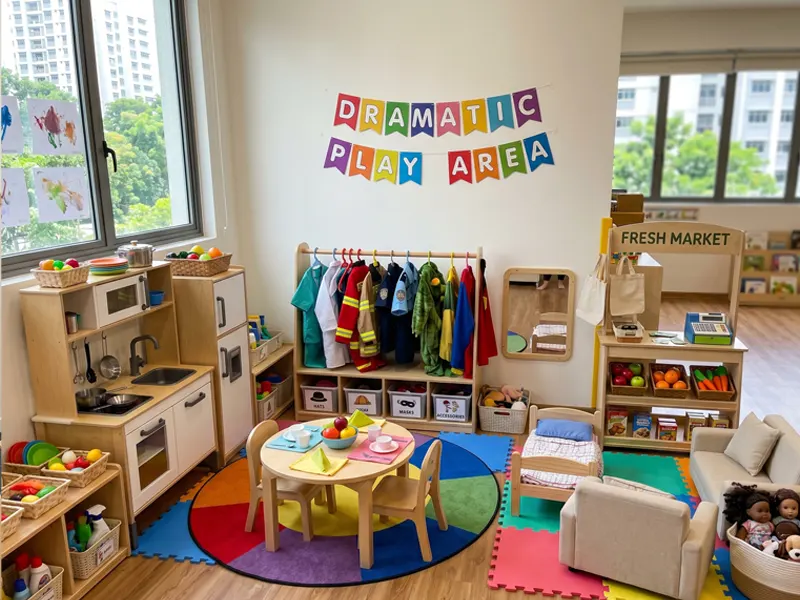
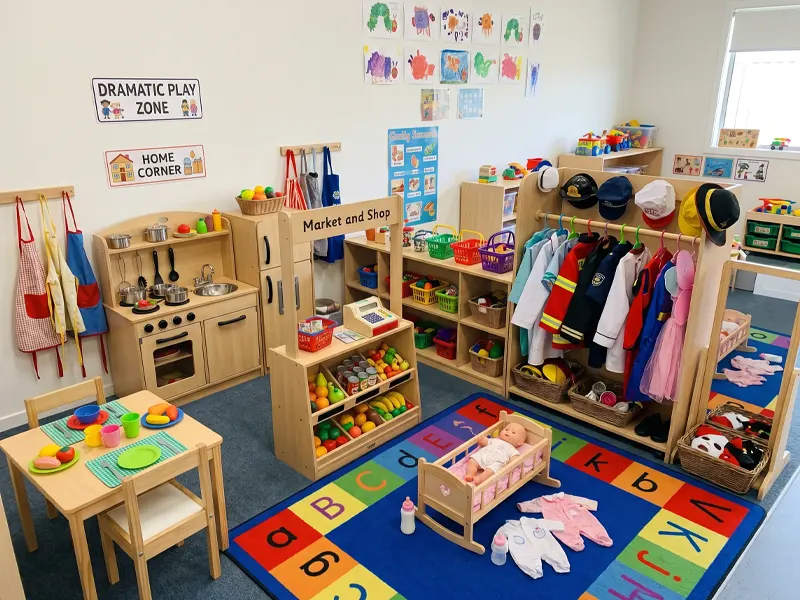
Dramatic Play Area
Dramatic play needs room for children to enter, move, talk, and change roles. Place the furniture near the props and storage that support the current theme, but do not fill the area with so many large pieces that children lose the ability to create their own scenarios.
Use a modular role-play furniture selection when the area needs to change over time. Before you order, confirm the footprint, access points, material requirements, and how the pieces will be packed and moved into the room.
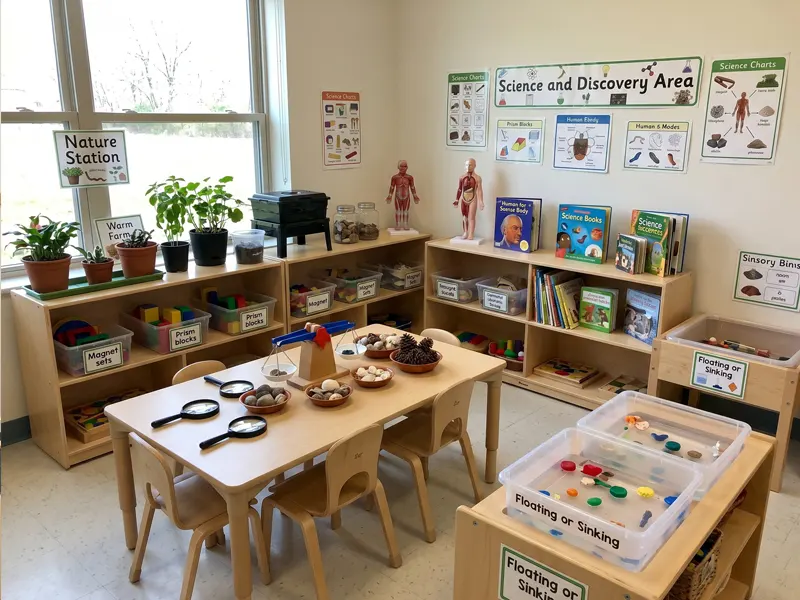
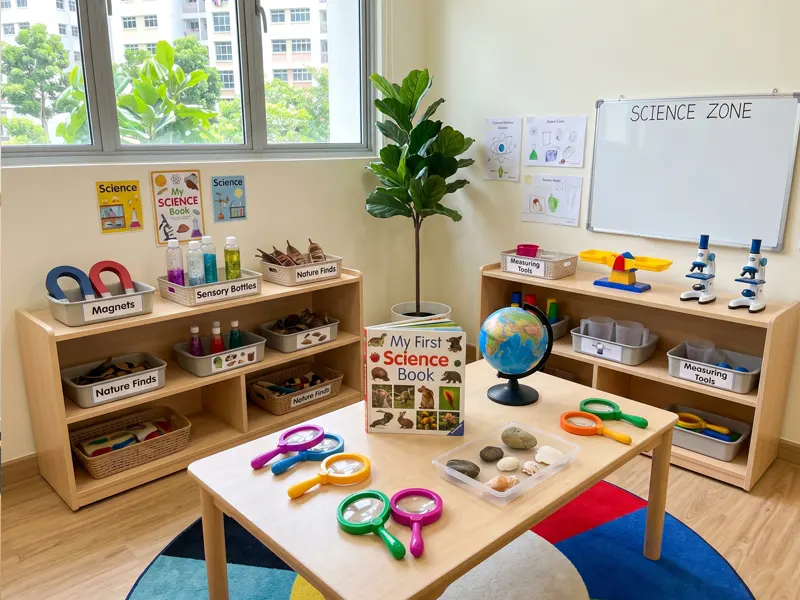
Science And Discovery Area
Place science and discovery where children can observe, compare, and revisit materials without blocking a door or a high-traffic route. Natural light, a display surface, trays, and controlled storage can make the area useful without requiring a large footprint.
Rotate a manageable selection of materials. If you display everything at once, the area can become difficult to use and harder to supervise. Small parts and tools should be controlled according to the age and needs of your group.
Sensory Play Area
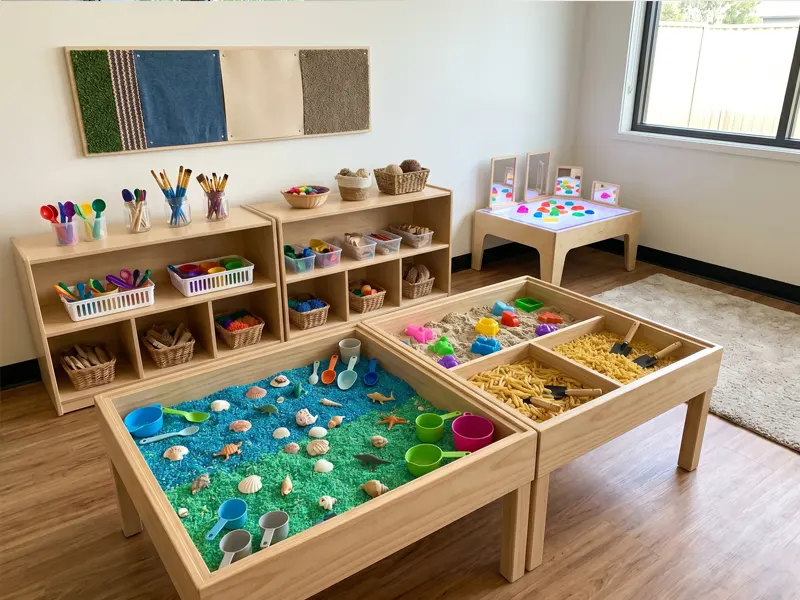
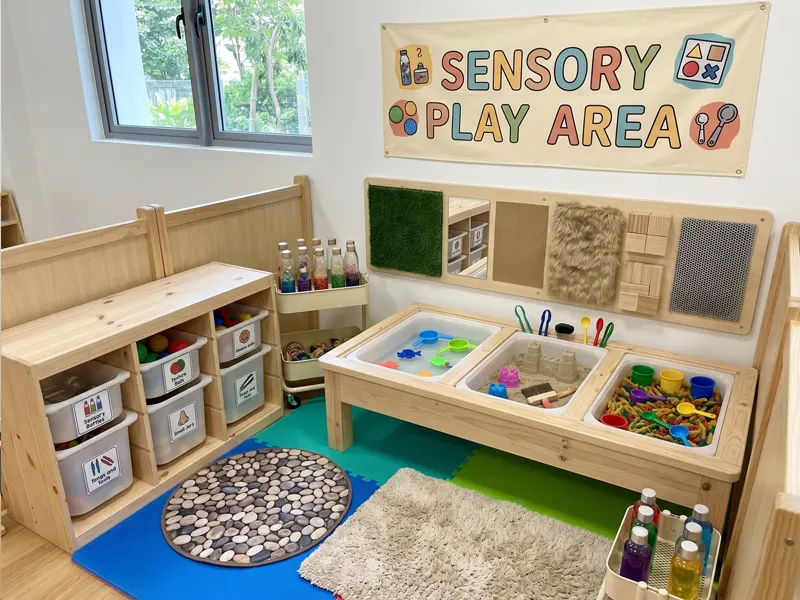
Keep sensory work inside a clear boundary and close to cleanup access. Do not place a sensory table beside books, electrical equipment, or materials that are difficult to clean. Store refills and tools where teachers can reach them, then provide only the amount of material the activity needs.
Nap Or Rest Area
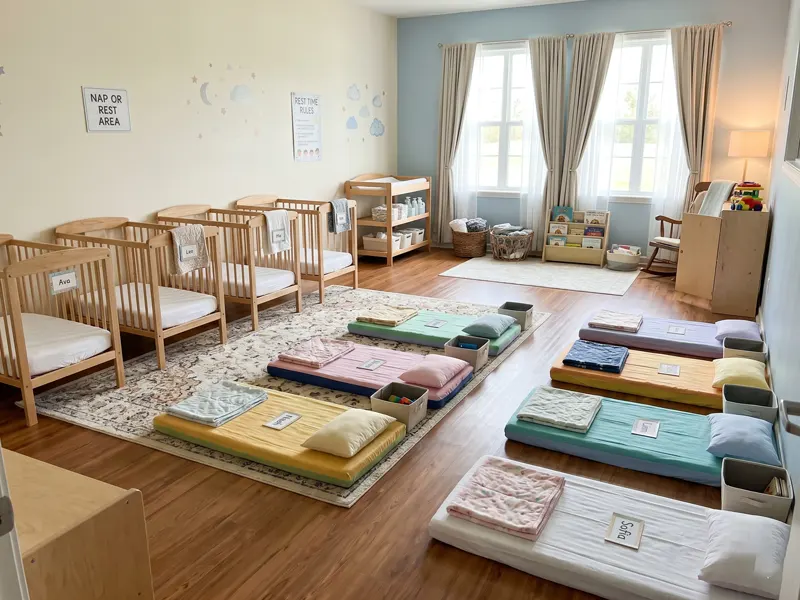
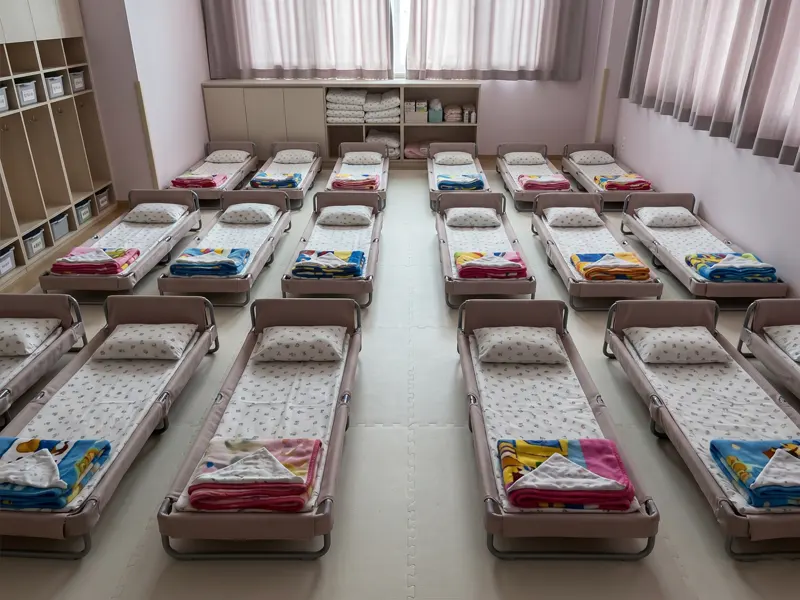
If your program includes rest time, protect the area from the busiest movement and loudest centers. Leave enough room for adults to reach each child and store or remove rest equipment without blocking another route. In a full-day program, foldable or stackable equipment can help you change the room between rest and active learning.
When you review rest mats or stackable nap cots, compare the product dimensions, cleaning routine, storage footprint, and the rules that apply to your program. A product page cannot replace a project-specific fit check.
Storage And Teacher Area
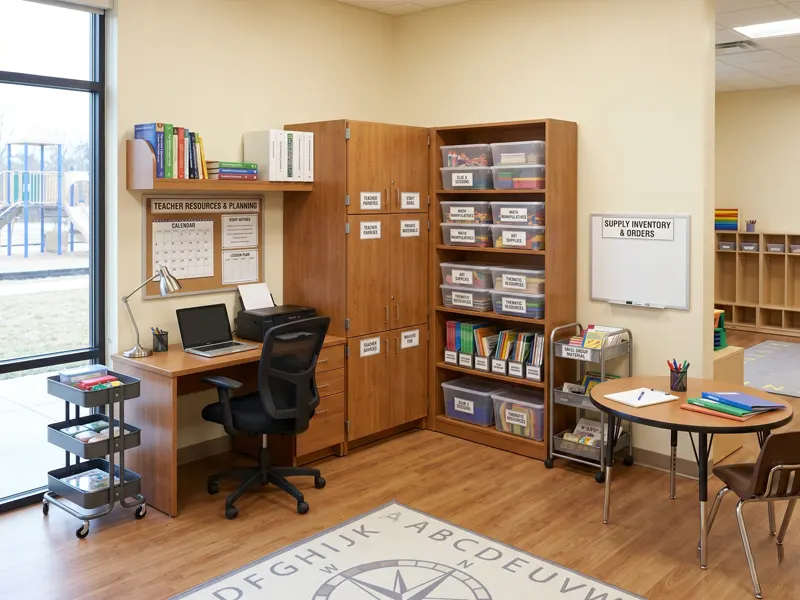
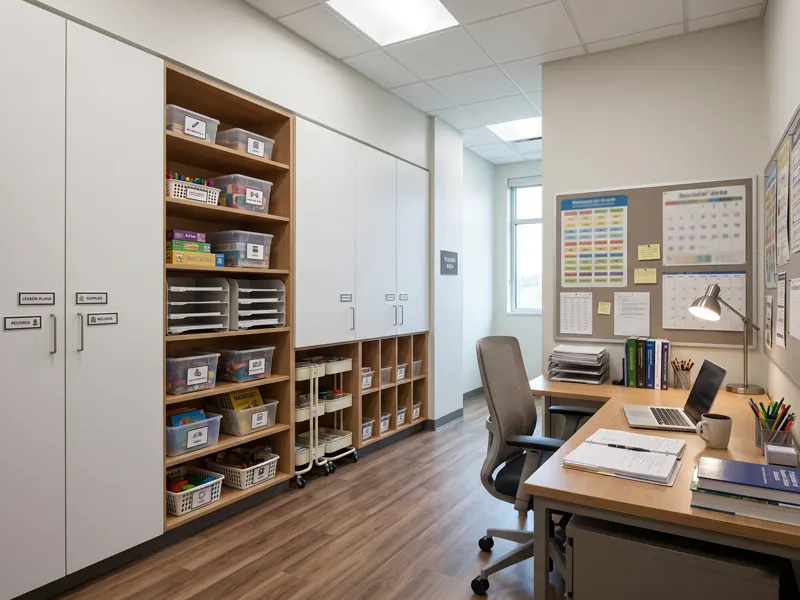
Storage is part of the layout, not a finishing touch. Place daily-use materials near the area where children use them, label them with words, pictures, or both, and keep teacher-only supplies controlled. A practical daycare classroom storage system should also account for personal belongings, artwork, cleaning routines, replacement materials, and seasonal rotation.
For a larger project, record the storage function before you request a quote: open access, closed storage, lockable storage, display, cubbies, mobile units, or a combination. This prevents you from comparing pieces by appearance when they are solving different problems.
Choose Furniture After The Plan
Furniture should reinforce your layout. Do not start with a catalog and try to fit every attractive product into the room. Start with the activity, the children, the available footprint, and the routine; then choose the piece that supports that use.
- Match the age group: Select tables, chairs, shelves, and handles that children can use comfortably and safely.
- Protect sightlines: Use low furniture to define areas and place tall or teacher-only storage where it cannot hide children.
- Check daily wear: Review stability, edges, hardware, surfaces, cleanability, and the way each piece will be used every day.
- Use mobility with a purpose: Mobile tables and storage help when you have real transitions; too many movable pieces can make the room difficult to reset.
- Separate standard and custom decisions: Standard pieces usually simplify replacement and repeat orders. Custom work can make sense when fixed dimensions, repeated room types, special storage, or a particular workflow cannot be served by a standard size.
- Plan the complete order: Record dimensions, quantities, finishes, packaging, labeling, delivery constraints, and installation needs before you approve the final specification.
Use A Simple Layout Brief
If you are working with a furniture supplier, designer, or project team, send a layout brief instead of only a list of products. Your brief should include the room dimensions, fixed features, age group, expected number of children, daily schedule, preferred learning areas, storage needs, budget range, target market, and delivery conditions.
| Project Question | Why It Changes The Plan |
|---|---|
| Who will use the room? | Age, mobility, group size, and adult supervision change furniture and circulation. |
| What happens every day? | Meals, naps, cleanup, and transitions change the amount of flexible space you need. |
| Which areas are permanent? | Permanent centers need stronger zoning; rotating centers need accessible storage. |
| What must be child-accessible? | Open shelves and labels support independence; teacher supplies need controlled storage. |
| What must be ordered together? | Dimensions, finishes, quantities, packaging, and delivery planning affect the final project. |
This brief also helps you compare suppliers fairly. You can ask each supplier to respond to the same room conditions, material expectations, quantity, packaging, and delivery requirements instead of comparing isolated product photographs.
Preschool Classroom Layout Examples
Use layout examples to study relationships, not to copy a room. Your door, windows, sink, fixed storage, age group, and teaching model will change the final arrangement.
Balanced Center Layout
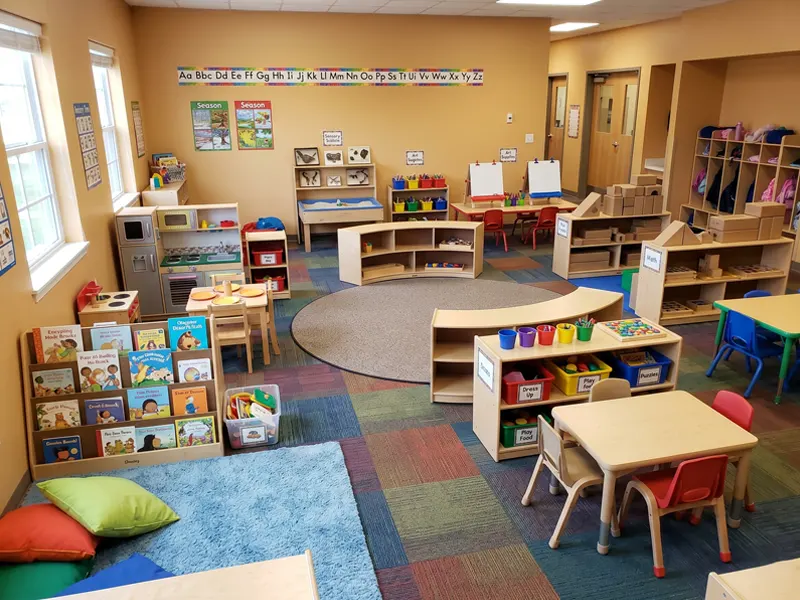
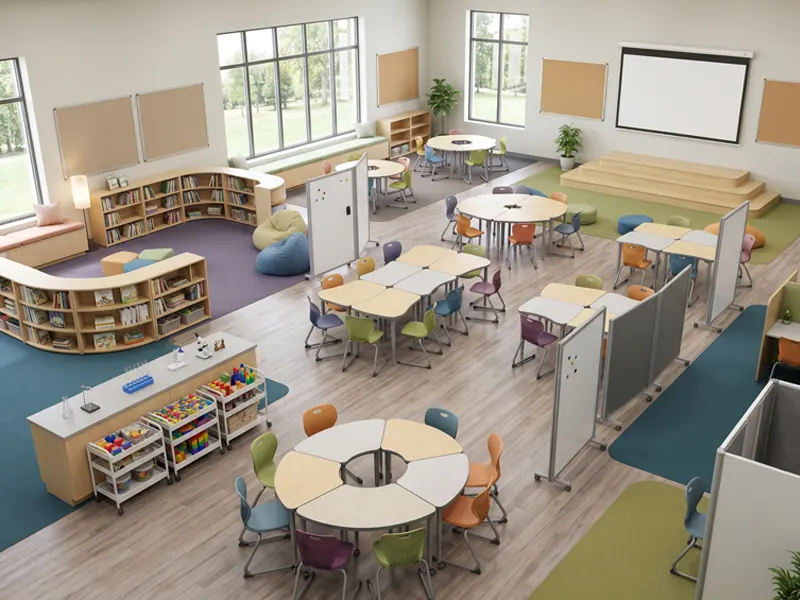
A balanced center layout protects quiet work on one side, places active centers in corners, keeps art or sensory work near cleanup, and uses a flexible area for group time. It suits a room that needs several learning functions without allowing one center to dominate the whole space.
Montessori-Inspired Layout
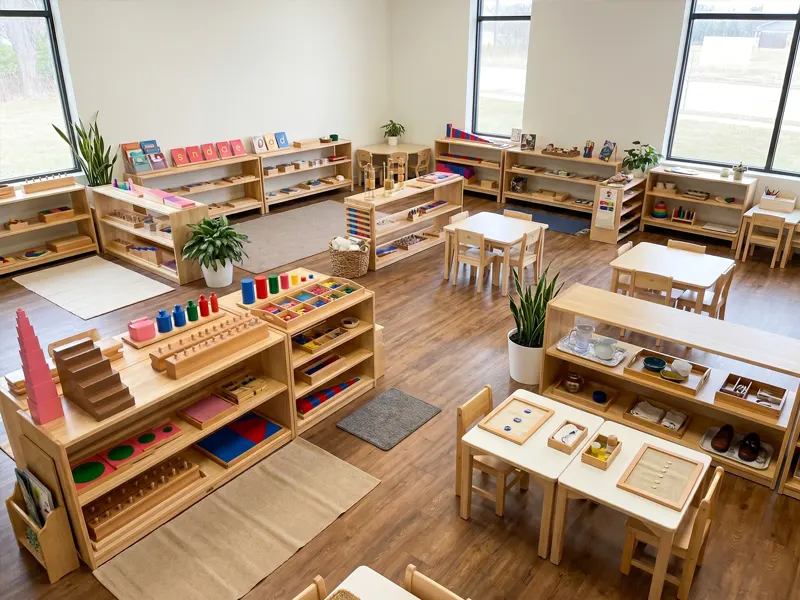
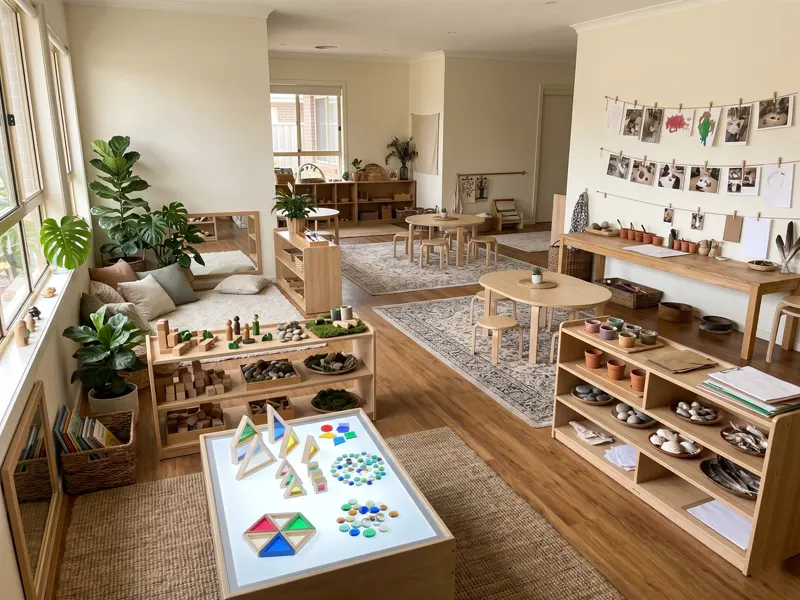
A Montessori-inspired room usually needs calm visual order, low shelves, accessible materials, defined work areas, and room for independent movement. Low shelves alone do not make a room Montessori; your materials, routines, adult role, and layout logic must support the approach together.
Reggio-Inspired Layout
A Reggio-inspired environment may give more space to open-ended materials, documentation, natural textures, light, and project work. You still need clear routes, accessible storage, and adult visibility. A display should support children’s work without turning a working area into a passageway.
Open Flexible Layout
An open flexible layout gives you more shared floor space for group work, movement, and changing projects. It works only when children can still understand where materials belong and teachers can still supervise the room. Open space without boundaries often becomes a storage problem and a traffic problem.
Improve An Existing Room
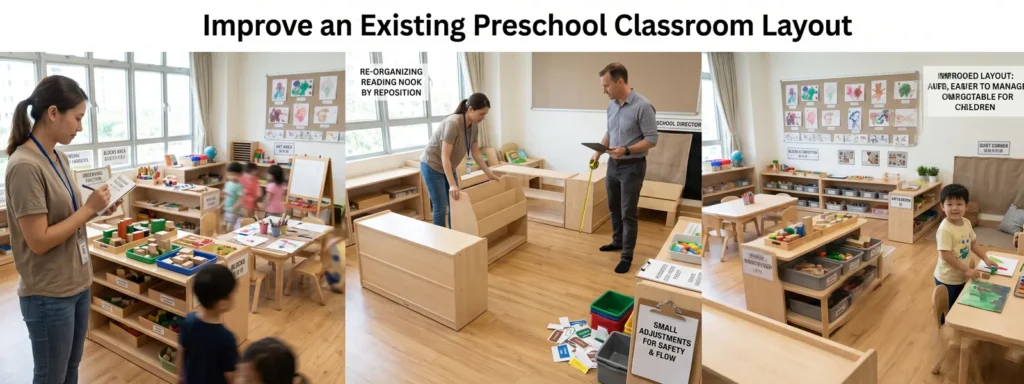
You do not need to replace everything to improve an existing preschool classroom layout. Watch the room during arrival, free choice, cleanup, meals, rest, and departure. The places where children crowd, noise spreads, materials disappear, or adults lose sight of a child show you where the layout is creating friction.
Record The Problem
Write down what actually happens: children wait at the sink, blocks spill into the walkway, the reading area is too loud, or teachers cannot see behind a cabinet. A specific observation gives you a better starting point than deciding that the room simply feels crowded.
Clear The Main Routes
Move furniture out of the routes between the door, personal storage, tables, sink, bathroom, and group area. Recheck the path when children carry materials or move in small groups, not only when one adult walks through it.
Reduce Visible Clutter
Keep daily-use materials visible and rotate extras. Too many open bins make it harder for children to choose and harder for teachers to reset the room. Store teacher supplies separately and label children’s materials in a way the group can understand.
Test One Change
Change one relationship first, such as moving the block area away from the entry. Observe movement, supervision, cleanup, and engagement before you rearrange the entire room. A layout is a working system, so testing is more useful than trying to create a perfect drawing in one attempt.
Review The Room When The Group Changes
Revisit the room when the age group, enrollment, staffing pattern, schedule, or furniture changes. Small adjustments can keep the classroom practical as children’s interests and movement patterns develop.
Turn Your Floor Plan Into A Furniture Plan
Once your zones and routes are clear, you can make better purchasing decisions. West Shore supports early learning projects by reviewing room dimensions and floor plans, matching furniture to the intended use, checking standard and custom options, and coordinating production, quality control, packaging, and delivery around the confirmed requirements.
When you request a layout or quote, send your room size, floor plan, age group, expected enrollment, preferred areas, quantities, materials, finishes, target market, and delivery conditions. The more clearly you define the project, the easier it is to compare options and avoid changes after production begins. You can contact West Shore when you are ready to review the next step.
FAQs
What Should You Send Before Requesting A Classroom Layout?
Send the room dimensions, a floor plan if available, fixed features, age group, expected number of children, daily schedule, preferred learning areas, storage needs, target market, budget range, and delivery location. Photos can help explain doors, windows, columns, and existing furniture that a simple drawing does not show.
How Can You Compare Two Preschool Layout Proposals?
Compare how each proposal handles movement, supervision, storage, activity relationships, furniture quantities, and future changes. Do not compare only the number of products or the visual style. Ask whether each layout still works during arrival, cleanup, meals, rest, and a busy center period.
When Should You Choose Custom Classroom Furniture?
Consider custom furniture when a fixed wall, unusual room shape, repeated multi-room requirement, special storage function, or project-specific workflow cannot be handled by a standard size. Before choosing custom work, confirm the dimensions, material, finish, quantity, packaging, lead time, and approval process so the design change is worthwhile.
How Do You Plan The Same Layout Across Several Classrooms?
Separate the standards from the room-specific decisions. You can keep the same approach to learning zones, labeling, materials, and storage functions while adjusting quantities and furniture footprints for each room. Record each room’s measurements and final specification so future replacement orders do not rely on memory.
What Should You Confirm Before Ordering From An Overseas Supplier?
Confirm the final drawings or specifications, dimensions, materials, finishes, hardware, quantities, packaging, labels, inspection expectations, trade terms, delivery method, and responsible approval contact. Keep the room plan and product list together so a late change to one does not create a mismatch with the other.
How Can You Keep A Classroom Layout Project Within Budget?
Set priorities before you buy: which areas must be permanent, which products need higher durability, which materials can rotate, and which furniture can serve more than one routine. Compare the full project cost—including packaging, delivery, installation, replacement, and future expansion—not just the unit price.
How Do You Plan For Future Expansion?
Keep a record of the room plan, product names, dimensions, finishes, quantities, and approved specifications. Choose a layout that can accept additional pieces without blocking the main paths, and identify which furniture can be reordered or adapted if enrollment or room use changes.
What Should You Do With A Room That Has Fixed Columns Or An Unusual Shape?
Use the fixed feature as part of the plan instead of trying to hide it. A column may help define a quiet boundary, storage edge, or display point, but you should check the remaining circulation around it. Draw the routes first, then test furniture footprints around the constraint before ordering anything.
Conclusion
Your preschool classroom layout should make the daily work of the room easier. Start with the children, routines, fixed features, and supervision needs. Then use learning zones, storage, furniture, and flexible space to support those decisions.
When you treat the layout, furniture specification, quality requirements, packaging, and delivery plan as one project, you reduce avoidable changes and create a classroom that can keep working as your program develops.