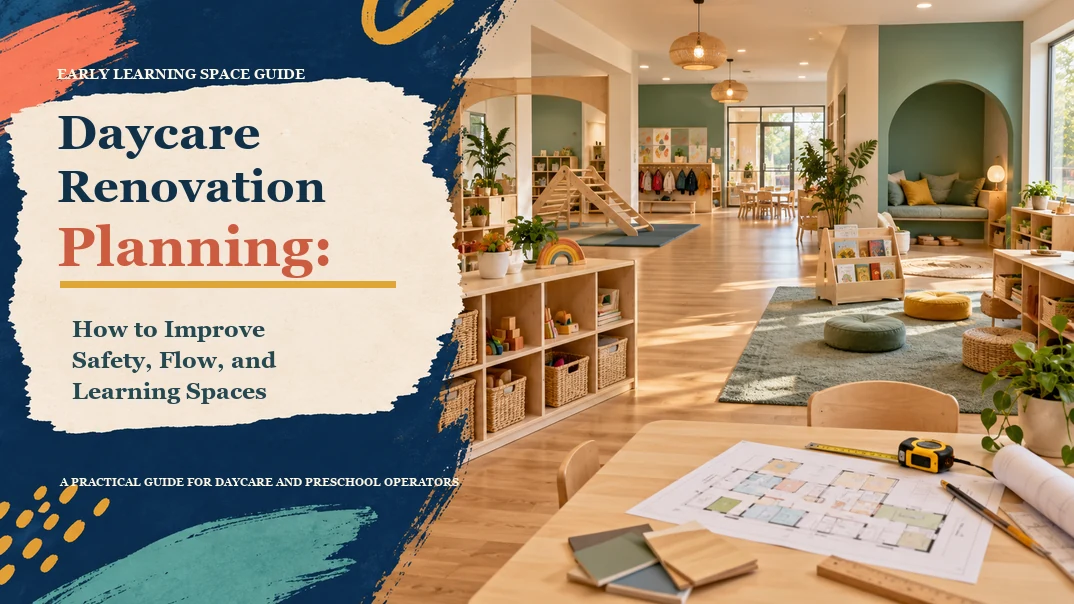
If your daycare feels crowded, hard to supervise, or difficult to reset between activities, a cosmetic refresh will not solve the real problem. Good daycare renovation planning starts with the way children, educators, families, and supplies move through the building. You map those daily patterns first, then choose layout changes, furniture, finishes, and phasing that make the center easier to operate.

What Daycare Renovation Planning Should Accomplish
A daycare renovation should give you a better working environment, not simply a newer-looking room. Before you draw a new floor plan, define the operational improvements you need to see after opening day:
- Safer supervision: educators can see the areas they are responsible for without standing in a doorway or moving furniture every few minutes.
- Clearer movement: arrivals, bathroom trips, handwashing, meals, rest, outdoor play, and pickup follow routes that do not cut through active learning areas.
- Age-appropriate use: infant, toddler, preschool, and mixed-age rooms have different needs for reach, rest, mess, and independence.
- Faster resets: materials have a defined home, cleaning points are easy to reach, and teachers can prepare the next activity without moving half the room.
- Longer-term flexibility: the space can handle changes in enrollment, curriculum, and furniture without another major rebuild.
These outcomes give you a better brief than “make it modern.” They also help you decide which work must happen now and which improvement can wait for a later phase.
1. Audit The Existing Center Before You Design
Walk through the center during a normal operating day. Empty-room observations miss where children queue, where educators lose sightlines, which doors stay open, and where carts, cots, backpacks, or cleaning supplies collect. Mark noise spillover between rooms and note any area that becomes unusable when tables, nap mats, or drying racks are in place.
Create a simple room-by-room inventory that includes:
- room dimensions, ceiling height, windows, doors, fixed plumbing, and electrical points;
- age group, licensed capacity, daily schedule, and staff positions;
- arrival and dismissal routes, handwashing, toileting, food preparation, and outdoor access;
- current furniture condition, storage volume, cleaning needs, and items that must remain;
- known hazards, bottlenecks, blind corners, pinch points, and surfaces that are difficult to sanitize.
Use your local licensing office and building professionals to confirm the rules that apply to your project. Child-care requirements vary by state and jurisdiction; the current licensing overview is a useful starting point, but it is not a substitute for a local review.
If you are unsure whether the existing area can support your planned enrollment, compare the room measurements with our guide to daycare space requirements per child. Treat the result as a planning check, not as a replacement for your local capacity calculation.
2. Turn Observations Into A Renovation Brief
Your renovation brief should fit on a few pages and answer the decisions that affect design, procurement, and installation. Include the number and age of children, staff routines, program priorities, target opening date, rooms that must remain operational, and the amount of disruption you can tolerate.
For each room, write three statements:
- What must improve? For example, “Teachers need a clear view from the art table to the block area.”
- What must stay? This might be a plumbing wall, an existing window, a nap routine, or a family check-in point.
- How will you know it worked? Define an observable result, such as “Two educators can reset the room in ten minutes without blocking the exit.”
Organize the brief by age group as well as by room. Our by-age selection framework can help you separate infant, toddler, preschool, and kindergarten needs before you begin choosing products. A preschool room that encourages independent access should not be planned like an infant room that prioritizes sleep, feeding, and close caregiver support.
3. Set Renovation Priorities Before You Choose Finishes
Use a three-level priority list so visual upgrades do not consume the budget needed for operational fixes:
Priority A: Safety, Access, And Daily Function
Resolve circulation conflicts, emergency access, supervision gaps, damaged flooring, poor lighting, handwashing access, and storage that creates trip or reach problems. If the renovation changes an existing facility, review accessibility early. The ADA guidance for child-care centers explains why physical access and reasonable modifications need to be considered for children, families, and visitors with disabilities.
Priority B: Learning Flow And Staff Efficiency
Once the basic risks are addressed, improve the relationship between activity zones. Put messy work near water and wipeable surfaces. Keep books and quiet work away from the loudest construction area. Place frequently used materials where children can reach them and teachers can scan them without turning their backs on the group.
Priority C: Visual Identity And Future Upgrades
Color, feature walls, display systems, and decorative details matter, but they should support wayfinding and a calm atmosphere. Choose them after you know where circulation, storage, and teaching surfaces will be located. A coordinated palette is easier to update than a theme that locks every future purchase into one visual style.
4. Plan The Connections Between Classroom Zones
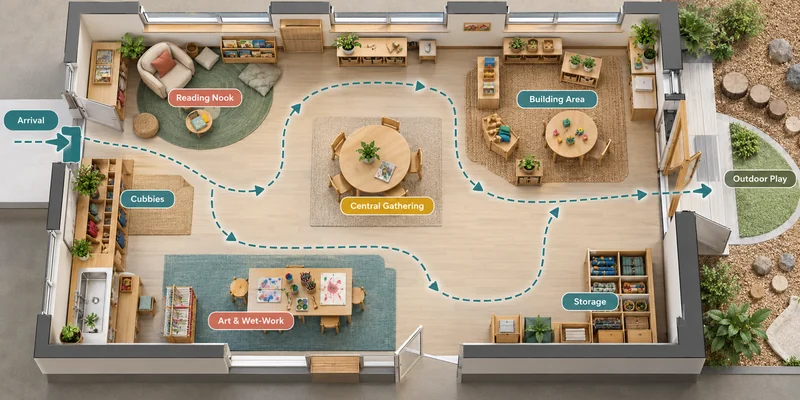
The renovation question is not simply “Which zones do we need?” It is “What should happen between them?” A room works when the entry leads naturally to personal storage, children can move from a work area to water or cleanup without crossing a quiet activity, and educators can see the next zone before children enter it.
Map The Day As A Sequence Of Handoffs
Draw arrows over the plan for the routines that happen every day: arrival to cubbies, cubbies to the first activity, activity to cleanup, cleanup to snack or toileting, and the classroom to outdoor play. Mark where the group pauses, where children change materials, and where an adult needs to step in. These handoff points—not the furniture catalogue—should determine the width and direction of your main routes.
Put Shared Resources At The Points Where Zones Meet
Shared resources should shorten transitions. Place art and sensory work close to water, drying, waste collection, and washable storage. Put frequently exchanged books or manipulatives on the edge between a small-group table and the shelf rather than across the main path. Keep personal storage near the entry so bags and coats do not travel through the learning area.
Use Low Boundaries To Connect Without Blocking Sightlines
Low open shelving, rugs, and changes in ceiling or wall color can signal a new zone while keeping the room visually connected. A quiet reading area may need a softer acoustic edge, but it should still be visible from an educator’s working position. Avoid tall cabinets or solid partitions at the exact point where staff need to see children moving between zones.
Separate Active, Quiet, And Service Traffic
Give active play and group movement a loop that does not cut through reading or regulation space. Keep deliveries, staff storage, and cleaning supplies on a service route that does not become a child pathway. When a wet-work area must share a route with outdoor play, position the sink, drying surface, and towel storage so a spill can be handled without closing the whole room.
Test The Layout With Three Real Routines
- Arrival: Can a family enter, store belongings, and reach the teacher without stopping the group?
- Activity rotation: Can children change materials while another group keeps working?
- Cleanup and transition: Can staff collect, wash, store, and move outdoors without crossing a quiet zone or blocking an exit?
5. Use Layout And Furniture To Improve Supervision
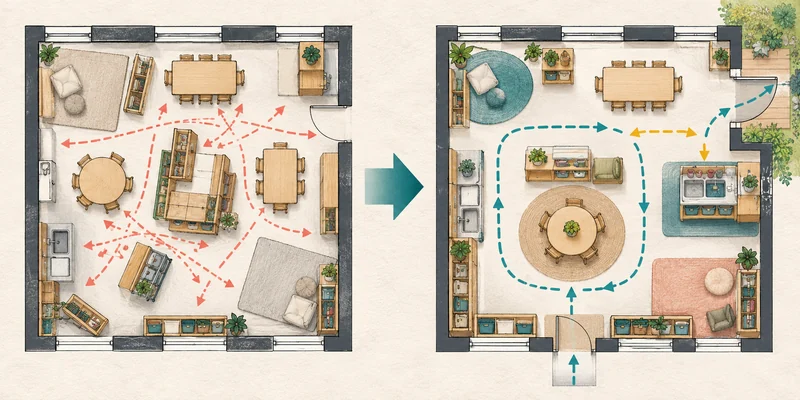
Start with the educator’s view, then place furniture. Stand in the positions where staff actually teach, help with toileting, prepare snacks, and greet families. If a tall cabinet, display panel, or play structure blocks the view of a doorway or corner, the problem is a layout problem—not a supervision problem for teachers to “work around.”
Use these checks during a plan review:
- Can an educator see the main activity zones from more than one position?
- Can children move to water, toilets, and storage without crossing the most active play path?
- Can you remove or reconfigure one table without dismantling the whole room?
- Are shelves, hooks, and material trays placed at a height that matches the users?
- Do doors, gates, and furniture leave a clear, understandable route during transitions?
For more examples of how furniture affects traffic patterns, compare the options in our guide to classroom seating arrangements. The goal is not to copy one arrangement; it is to test whether the arrangement supports your group size, teaching style, and supervision needs.
6. Specify Materials For Cleaning, Repair, And Replacement
Daycare interiors take repeated cleaning, spills, shoe traffic, art materials, and frequent rearrangement. When you review materials, ask what happens after six months of real use:
- Can staff clean the surface without special products?
- Can a damaged component be repaired or replaced without discarding the complete unit?
- Will edges, hardware, and joints remain stable after repeated movement?
- Does the finish show fingerprints, paint, or wear in a way that creates extra work?
- Can replacement parts or additional units match the original configuration later?

For a broader procurement checklist, use our guide to furnishing a daycare center. Select products by use, age, room, maintenance routine, and available space—not by appearance alone.
7. Choose A Renovation Sequence That Protects Operations
Renovating while the center is open requires a sequence that respects children’s routines. A practical project flow is:
- Site audit: measure rooms, photograph existing conditions, map routes, and list constraints.
- Program brief: confirm age groups, capacity, routines, staffing, storage, and priorities.
- Concept layout: test zones, sightlines, furniture footprints, and access before selecting every item.
- Design development: coordinate finishes, power, lighting, plumbing, signage, storage, and product specifications.
- Procurement and production: confirm the approved list, quantities, packaging requirements, and quality checkpoints before production.
- Installation and hand-off: stage rooms, inspect hardware and surfaces, label storage, and walk the daily routines with staff.
West Shore approaches this as a connected workflow. Our classroom design and layout service can begin with your room dimensions and program requirements, then connect layout decisions with product selection, customization checks, production quality control, packing, and shipping coordination. That connection reduces the risk of approving a beautiful plan that cannot be packed, installed, or maintained as intended.
8. Build A Phased Plan When A Full Closure Is Not Practical
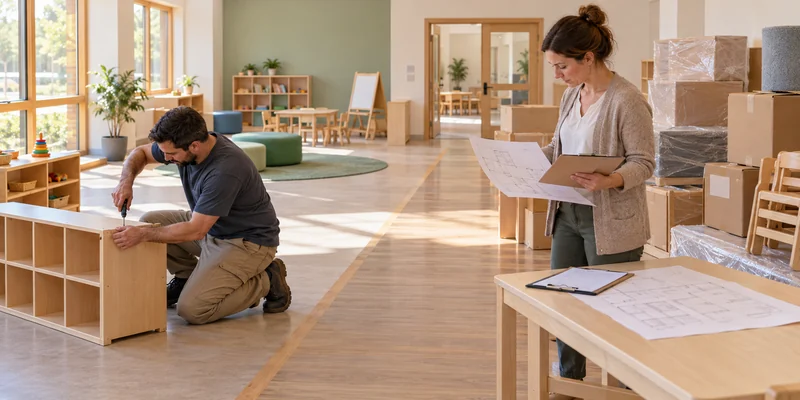
A phased renovation can work when you isolate work areas, protect clean routes, and move children only after a room is ready. Start with the room or system that removes the biggest operational constraint. A new display wall can wait; a blocked bathroom route or inadequate storage usually should not.
Before each phase, document:
- the exact work boundary and temporary barriers;
- where children, staff, deliveries, and waste will move;
- which furniture and materials will be stored off-site;
- the inspection and cleaning steps required before reoccupation;
- who signs off the room and communicates the change to staff and families.
Keep one approved drawing and one product schedule as the source of truth. When a substitution is necessary, record its effect on dimensions, supervision, storage, cleaning, and the next phase. Unrecorded substitutions are a common reason a renovation drifts away from the original plan.
9. Make Budget Decisions By Lifecycle, Not By Sticker Price
Instead of assigning the largest share to the most visible room, rank decisions by the cost of not fixing them. A storage change that saves teachers fifteen minutes every day can be more valuable than a decorative feature that families notice once. A flexible table system may also be worth more than a larger quantity of fixed furniture if enrollment or room use changes during the year.
Divide your list into “must complete,” “improves operation,” and “future enhancement.” Add a contingency for site conditions and keep a small replacement allowance for high-use components. Your supplier should be able to explain what is confirmed, what is customizable, and what still requires a project-specific check before you approve production.
Common Daycare Renovation Planning Mistakes
- Designing from an empty-room photo: the plan fails when nap cots, bags, carts, or drying racks arrive.
- Choosing furniture before measuring: a product can be appropriate on its own but wrong for the clearance and sightlines in your room.
- Solving storage at the end: loose materials then occupy circulation paths and teaching surfaces.
- Treating all age groups the same: reach, rest, mess, independence, and supervision change with age.
- Leaving installation to the last week: missing hardware, damaged cartons, or an untested layout can delay reopening.
- Using one plan for every site: an efficient renovation responds to the existing building, local requirements, staff routines, and program model.
Daycare Renovation Planning FAQ
What Is The First Step In A Daycare Renovation?
Start with a site and operations audit. Measure the rooms, observe a normal day, map supervision and movement, and record the constraints that a new layout must respect. Do not begin with paint colors or a product list.
Can You Renovate A Daycare While It Remains Open?
Sometimes. It depends on the work type, local rules, separation of work zones, noise, dust, access to exits and bathrooms, and the number of rooms available for temporary use. Get approval from the relevant licensing and building authorities before you finalize a phased schedule.
How Do You Plan A Daycare Renovation For Different Age Groups?
Write a separate room brief for each age group. Infants need close caregiver support and protected rest routines; toddlers need durable, reachable materials and short, obvious routes; preschoolers can use more open-ended centers and independent storage. The layout should reflect those differences.
What Should You Give A Daycare Furniture Supplier?
Share a dimensioned floor plan, photos, ceiling and door information, age groups, capacity, daily routines, required storage, preferred materials, delivery constraints, and the improvements you want to measure. A supplier can make a more useful recommendation when the room and workflow are clear.
Plan The Renovation Around The Day You Want To Run
A successful daycare renovation is visible in the ordinary moments: children can choose materials, teachers can scan the room, families know where to go, and staff can clean and reset without fighting the layout. If you are ready to move from observations to a coordinated plan, send West Shore your floor plan, room measurements, age groups, and renovation priorities. You can request a layout discussion before you finalize products or construction decisions.