One of the rewarding investments you can make is setting up an art centre in your school classrooms. It benefits your students by giving them a dedicated space to explore their self-expression. This guide explains the step-by-step process of setting up an art center.
Benefits Of Setting Up an Art Center
Having a dedicated art center in your school or kindergarten chain is an investment that improves your operations, adds to your curriculum quality, and increases enrollment. The list below shows some benefits of setting up an art center,
- Improves Staff Efficiency: Having standardized storage labels, shelf layout, and supply locations across every classroom instead of allowing each teacher to organize materials differently guarantees improved staff efficiency. This means that when staff move between classrooms or you hire new teachers, they will locate supplies immediately, thus reducing preparation time while maintaining routine consistency.
- Develops Children’s Curriculum Across Various Subjects: For each month, planning the art activities around classroom themes will help the children develop their curriculum across their subject. For instance, when you pair leaf printing with nature lessons. Color mixing with basic science, or shape collages with early mathematics. This way, one activity will reinforce multiple learning objectives without an extra teaching period.
- Scales Consistently Across Various Locations: If your school has multiple art centers in various campuses, ensuring uniformity in your furniture dimensions, storage layouts, material lists, and safety procedures across all your art centers will help you scale consistently across all locations. For instance, when you have standard supplies like double-sided easels, labeled storage bins, and drying racks, you’ll get simplified staff training, bulk purchasing, and classroom consistency.
- Improve Social and Communication Skills: Children improve in their social and communication skills when you arrange tables for 4-6 children in your art center rather than individual workstations during collaborative activities. When children are in small groups, it encourages them to share materials, discuss ideas, negotiate roles, and solve problems together without making it difficult to supervise the classroom.
- Make Your School Unique to Prospective Parents: If your school conducts enrollment tours weekly or biweekly, having a display board of around 1.2–1.5 m (4–5 ft) that showcases children’s completed artwork within the last two weeks close to the classroom entrance with the child’s first name, age group, and learning objectives will make prospective parents perceive your school as “unique.” This signals to parents about your school’s active learning, gives them assurance about your classroom engagement, and shows your school’s commitment to child development rather than displaying only decoration.
Step-by-Step Process Of Setting Up an Art Center
Beyond your passion for creativity, setting up an art center requires strategic planning and processes. In this section, we’ll walk you through the step-by-step process of setting up an art center that does not bore children.
Step 1: Find a Good Location
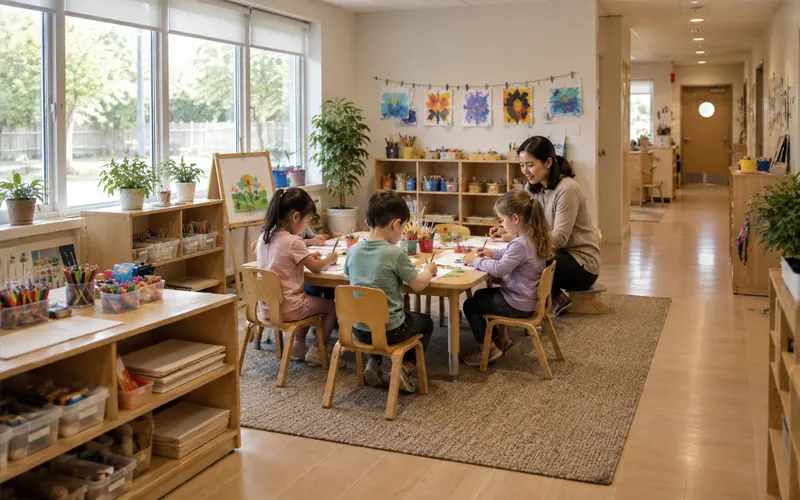
This stage involves positioning your art center in the brightest corner of a room. Research shows that children tend to be more proactive in their physical activities and cognitive performance when they have access to natural daylight.
Therefore, make sure this section is located where there’s consistent, indirect natural light. This guarantees the children accurate color perception when they’re painting and drawing.
However, if there’s a limitation of natural light in your classroom, we recommend that you install LED lighting with a Color Rendering Index of at least 90 and a 5000–6500K color temperature. This way, children will have lightning that closely replicates daylight without severe eye strain.
Additionally, ensure you visually define the spaces as the art zone. You can do this by using rugs, low shelving, or furniture placement. This allows children to have the idea of where creative activities happen, and it is easier for staff to supervise.
Don’t just place the art center at the entrance, locker, or main walkway of the classroom. Instead, locate it in low-traffic areas. This way, children will not be interrupted during creative activities. Plus, it will make it easier to supervise children without blocking circulation routes.
Lastly, if your school is managing multiple classrooms, it’s recommended that you standardize this placement logic across all rooms. Plus, ensure there is more consistent staff training and facility walkthrough.
Step 2: Organize the Art Center for Easy Learning and Movement
The next step is to set up the creative flow of your art center. Remember, creating a functional art center is beyond just decoration; you need to equip the art center with beautiful supplies and labels.
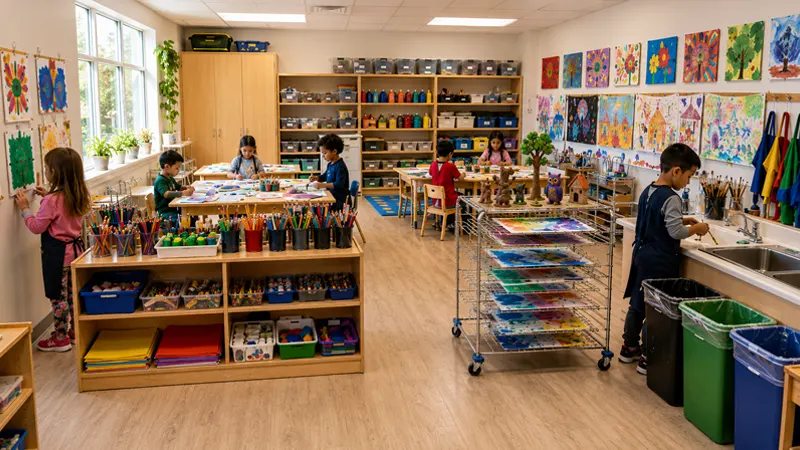
Also, you need to create a well-organized art center that does not contradict how children use the art center. The list below shows the few steps you need to consider when you’re creating each:
- Entry Zone: The entry zone should naturally be where children enter the classroom, not in a corner. Don’t overcrowd the wall; instead, display around 3-5 inspirational samples at children’s eye level.
- Material Selection Zone: For this section, use open shelves of 45-60 cm (18-24 inches) high to store frequently used materials such as crayons, paper, and paintbrushes so that preschoolers can reach them independently. Ensure you keep sharp tools, specialty paints, and extra supplies in a high locked cabinet to ensure children’s safety.
- Creation Zone: Maintain a space of at least 90 cm (3ft) between tables in your art center for free movement among children and teachers. Your painting tables should be very close to sinks to reduce spills, while ensuring drawing and collage tables stay far away from wet activity areas.
- Drying Zone: A drying zone is a spot reserved for drying wet paintings or sculptures. Here, your drying racks should be within one or two steps of the painting area. This way, children don’t have to carry their wet artwork across the room; instead, they place it down immediately. If you’re setting up your art center for two or more classes to use them at once, then we recommend that you choose a multi-tier drying rack with removable shelves.
- Display Zone: This zone helps celebrate children’s finished artwork. Display children’s artwork at approximately 90–120 cm/36–48 inches from the floor so that children can see their work. This way, children can easily access their artwork independently. One section in the display zone should be for rotating weekly displays, while the other should be for long-term projects to keep the display area engaging.
- Cleanup Zone: This section should be positioned next to the sink. Plus, use picture labels to show children where each item belongs. Use separate bins for recyclable paper, reusable materials, and general waste to educate children about taking their cleanup routine seriously while also reducing supply replacement costs.
- Storage Zone: Use labeled stackable containers to store seasonal materials and bulk supplies instead of cardboard boxes. This way, staff will quickly identify the contents. Place Children’s frequently used materials on lower shelves, then keep a space at the upper cabinets for inventory backup and teacher-only supplies.
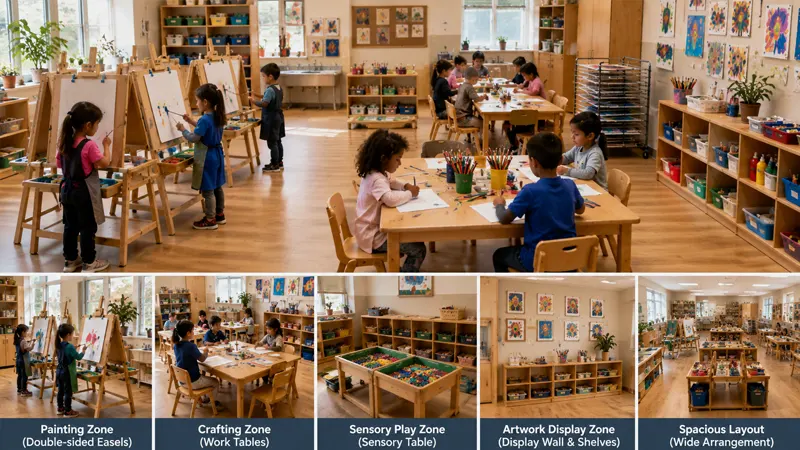
Step 3: Choose a Befitting Furniture
At this stage, you need to choose furniture that matches the children’s age group. Remember, you must choose furniture that aligns with the size, shape, and age group of each classroom. As you may know, each zone of your art center should have unique furniture ideas.
For instance, if your art center is smaller than 15 m² (161 sq ft), it is recommended that you choose double-sided easels. Unlike single-sided easels, it provides more children with the opportunity to work simultaneously without increasing the classroom footprint. This allows the children to maximize every square meter, helps you maximize limited space, reduces the cost you incur on furniture, and helps you maximize ROI from each of your workstations.
Meanwhile, if your art center can occupy more than 20–25 square meters, consider creating a special section for painting, crafting, sensory play, and artwork display. Having a separate zone reduces traffic congestion, makes supervision easier, and allows multiple groups of children to work without disruption.
Also, it’s recommended that your drawing and painting classroom sitting arrangement should be wide enough for two or more children to paint on the easels.
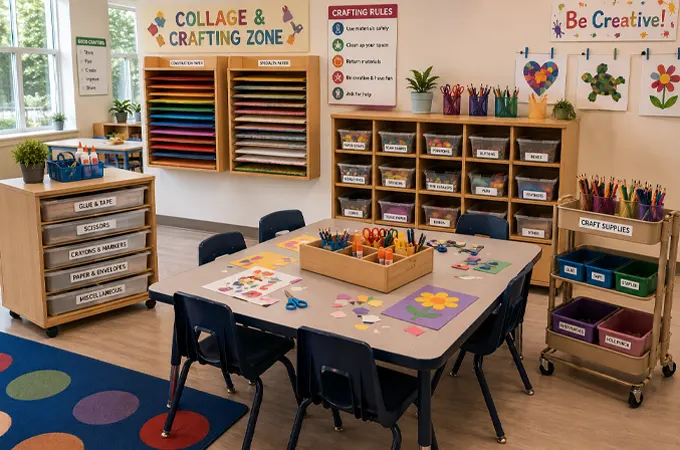
Collage and Crafting Zone
Here is where children learn to cut, glue, fold, tear, and create their unique art projects through the combination of different materials. Here are some recommended furniture and product ideas for this zone:
- Low crafting table supports proper posture, collaboration, and comfortable hands-on crafting.
- Multi-compartment supply caddy for organizing small craft materials into separate sections.
- Roll-out drawer units to store craft materials in labeled drawers.
- Wall-mounted paper racks for keeping different paper types visible, organized, and protected.
- Portable supply carts for moving craft materials between learning areas.
When setting up your art center, if you aim to allow children to complete college activities at least three times a week, instead of purchasing untreated wooden tables with high maintenance costs, go for high-pressure laminate (HPL) or melamine-coated crafting tables. These furniture surfaces have a good resistance to glue stains, paint spills, and scratches. They guarantee reduced maintenance costs and make your furniture last over time.
Meanwhile, consider installing wall-mounted paper racks above, then stackable cube organizers below your crafting tables if you are setting up your art center in a classroom with little storage. This way, children will easily access the materials they use frequently while ensuring there is enough valuable space for collaborative projects.
Lastly, children’s safety will be guaranteed if you choose soft-close drawers with rounded corners. They keep the children safe from finger injuries and withstand everyday classroom use.
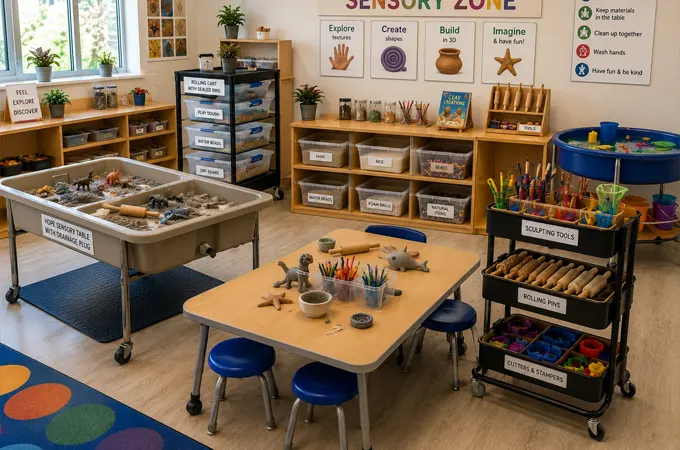
Sculpting and Sensory Zone
In this zone, children explore different textures, shapes, and three-dimensional materials. This zone is important because it opens the children to hands-on activities. The list below shows the recommended furniture and product ideas for this section:
- Deep bin storage carts with sealed lids for storing sensory materials safely.
- Sturdy sensory tables or tubs with attached rims provide a durable, spill-resistant workspace.
- Rolling trays or shelves allow teachers to transport sensory materials easily.
- Child-sized stools or standing tables support proper posture and comfort.
- Tool kits organize rolling pins, sculpting tools, cutters, and stampers.
This zone is the sensory area where children use water, clay, or wet materials often. Here, we recommend that you use HDPE sensory tables with built-in drainage plugs instead of wooden activity tables. HDPE is the most recommended for this zone because it resists moisture and staining, and it’s easier to clean after messy activities.
Meanwhile, if the classroom of your art center has limited storage space, go for rolling sensory carts with sealed polypropylene bins. This will simplify teachers’ work by ensuring free movement of materials between zones while ensuring all sensory supplies are protected and safe from contamination.
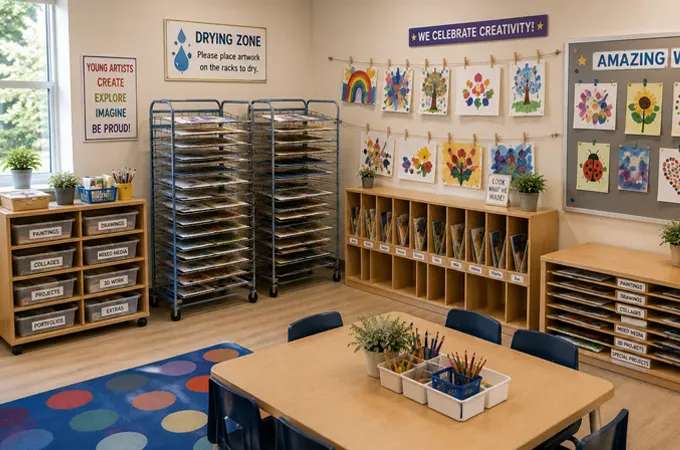
Drying and Display Zone
This area in an art center is where you place the children’s finished artwork to dry up. You can also see it as a place where you celebrate the children’s creativity by showcasing their completed art projects.
The list below highlights some suitable furniture and product ideas for this zone:
- Tiered drying racks to separate wet artwork on multiple shelves.
- Wall-mounted clip lines or wires with clothespins to display children’s artwork at eye level.
- Magnetic display boards for holding artwork securely with magnets.
- Individual display cubbies or slots to showcase completed artwork.
- Portfolio storage racks or flat drawers to protect finished artwork from bending.
If your art center classroom setup can accommodate more than 15 children, tiered drying racks with 5-8 adjustable shelves are the best compared to flat drying trays. Unlike flat drying tray surfaces, you can dry multiple artworks of the children on tiered racks for simultaneous drying. Plus, tiered racks reduce smudging and how much paper sticks together.
For your display areas, install magnetic display boards or clip lines 90-120 cm from the floor. This makes the artwork be on children’s eye level, thus making the children have a discussion about their artwork without teacher interference.
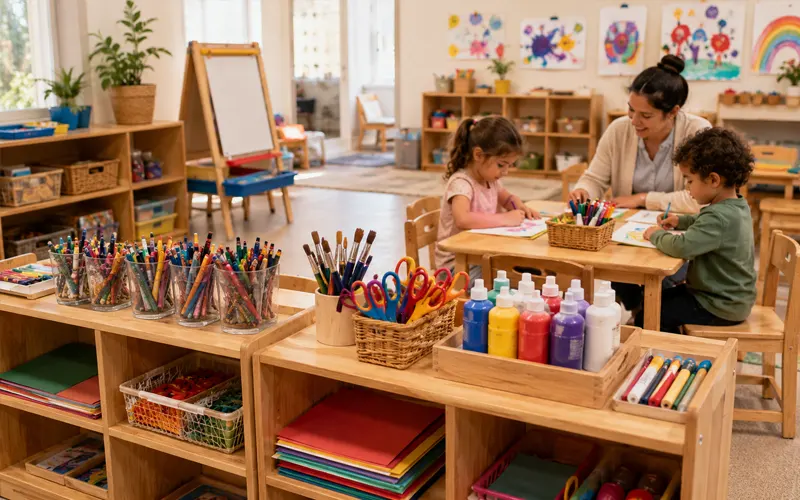
Step 4: Fill Your Art Centers with Age-Appropriate Materials
Here, always remember, the art center materials you’re selecting should match the children’s developmental stage. For instance, if you’re setting up an art center, choose the following;
| For Toddlers (roughly 14–24 months) | For Preschoolers and pre-K children (2–4+ years) |
| Chunky crayons for early drawing and grip development. | Washable tempera paints to mix colors. |
| Washable finger paints to recognize colors early. | Watercolor paints for color blending. |
| Large paintbrushes to paint comfortably. | Regular crayons develop drawing skills |
| Thick drawing paper for scribbing and painting. | Washable markers for encouraging colorful drawing |
Jumbo markers (washable) for supporting early drawing skills. | Colored pencils improve precision, hand control, and detailed coloring. |
When you want to purchase materials for toddlers, don’t buy preschool art kits like fine-tip markers, glitter glue, etc., for classrooms. Toddlers cannot use these embellishments effectively and safely. Instead, first purchase five or six core materials like jumbo triangular crayons because small hands can easily grip them. Plus, they don’t easily roll off tables.
For preschoolers, choose washable tempera paints over acrylic paints. It’s easier for children to wash it from their skin, clothing, and classroom furniture. You should consider purchasing high-consumption items such as drawing paper, crayons, and tempera paints in classroom-value packs if you are setting up your art center in more than one classroom.
However, only buy a small quantity of water colored pencils. When children develop the hand control they need to use watercolor pencils effectively, you can start buying them in large quantities. This approach guarantees minimal waste, reduces annual supply costs, and makes sure children have materials that help their developmental stage at their disposal.
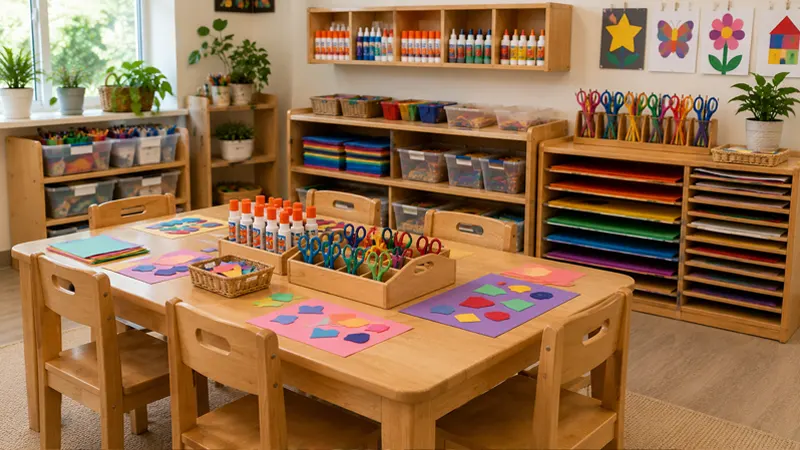
Cutting and Gluing Materials
At this stage, how children make choices, control, and have hands-on construction is all that matters. Cutting and gluing play an important role in the development of children’s fine motor strength, the development of spatial awareness, and help them start to think about how they can combine parts to form a whole.
For this section, don’t choose liquid glue for toddlers (14-24 months); instead, choose solid glue sticks (20-40 g) because they’re easier for small hands to control, dry faster, and reduce cleanup time.
For preschoolers, be sure that the children are up to the stage where they can follow simple safety instructions and cut paper in a straight line before you open them up to round-tip, and spring-assisted training scissors.
Always ensure your inventory management is simplified, have consistent quality of supplies, and that you have cost-effective bulk reordering by standardizing one brand of glue sticks, construction paper, and child-safe scissors if you’re buying supplies for various classrooms,
Remember to buy only non-toxic materials that are up to safety standards when you’re buying supplies for multiple classrooms. Plus, ensure the supplies are easy to replenish and can be ordered in bulk to reduce costs.
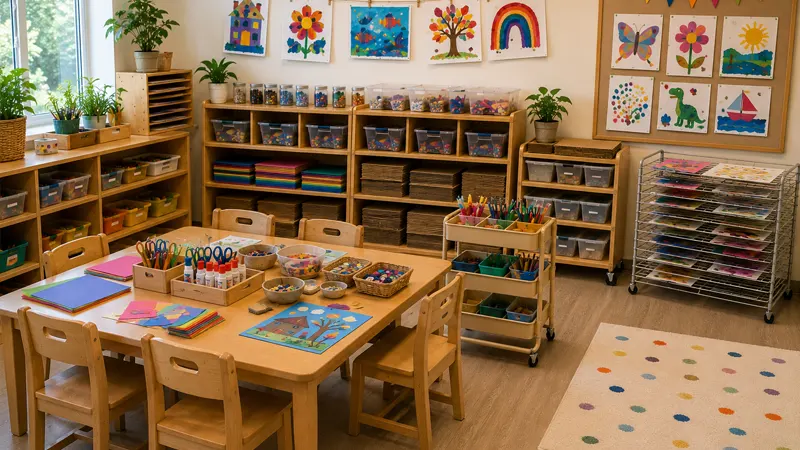
Craft and Collage Material
At this stage, children bring all their imaginations to life. It’s a stage that allows the children to take creative risks and develop a good storytelling ability.
Here, there should be various materials the children can choose and combine; however, you have to keep them organized for both a structured project and spontaneous exploration.
| For Toddlers (roughly 14–24 months) | For Preschoolers and pre-K children (2–4+ years) |
| Contact paper allows toddlers to stick lightweight materials without using glue. | Sequins add sparkle and decorative details to artwork. |
| Bubble wrap introduces children to different textures and patterns. | Beads (large) for creating decorative crafts and simple threading activities. |
| Corrugated cardboard pieces encourage texture exploration. | Paper straws for building simple structures and decorating creative classroom craft projects |
| Foam stickers allow toddlers to decorate artwork independently without needing glue or scissors. | Cupcake liners for turning paint and glue into flowers, animals, etc. |
| Washi tape allows supervised sticking and decorating without the mess of liquid glue. | Paper bags for making puppets, masks, and imaginative storytelling crafts. |
If you want to set up your art center classroom with the aim of conducting craft activities three or more times a week, don’t store sequins, beads, and decorative embellishments in an open shelf; instead, store them in a teacher-controlled container. This is because children quickly consume these materials during free play, and it’s not always easy to replenish them in bulk.
Also, if you want to set up your art center classroom to accommodate more than 20 children, you should purchase corrugated cardboard sheets instead of pre-cut cardboard shapes. This makes it easy for teachers to cut them into different sizes for collages, model building, and seasonal crafts, thus making them economical over an entire school year.
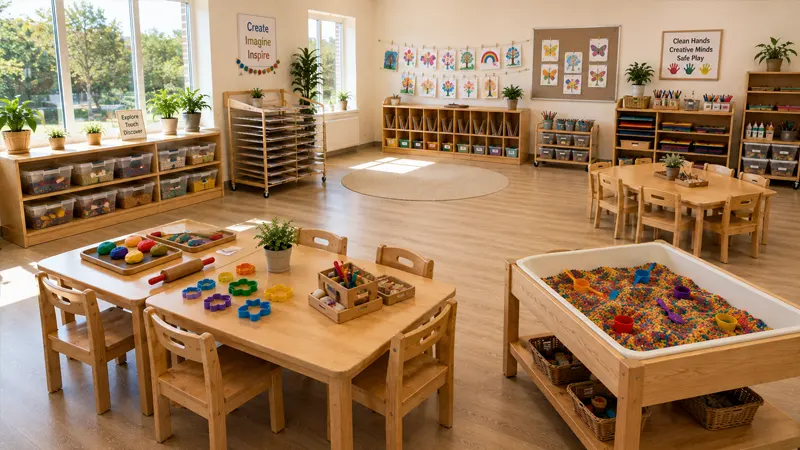
Sensory and Tactile Materials
The sensory and tactile area encourages children to learn by feeling, shaping, and manipulating materials with their hands.
Here are a few sensory and tactile materials you can add when setting up an art center:
| For Toddlers (roughly 14–24 months) | For Preschoolers and pre-K children (2–4+ years) |
| Homemade playdough strengthens hand muscles. | Sensory rice promotes scooping, pouring, measuring, and imaginative play. |
| Taste-safe sensory dough allows younger toddlers to explore textures safely. | Modeling clay develops finger strength and creativity. |
| Water play toys introduce simple cause-and-effect learning. | Pom-poms support sorting, counting, transferring, and texture exploration. |
| Large natural sponges encourage texture exploration. | Pipe cleaners encourage bending, twisting, and shaping |
| Cotton balls support sensory exploration, painting, and simple collage activities. | Sensory beads strengthen fine motor skills. |
If your art center classroom uses sensory rice or homemade playdough every day, don’t store all the supplies in one large bin; instead, separate them into individual 1-2 L airtight containers. This will save the entire batch from contamination in case one container is spilled or soiled.
For modeling clay, air-dry clay is the most recommended if your art center classroom will be holding frequent class sections. This guarantees less residual on tables, and it makes it easier to clean compared to oil-based clay. If you notice discoloration in your homemade dough or it develops an odor, don’t hesitate to replace them to ensure the hygiene and safety of the children.
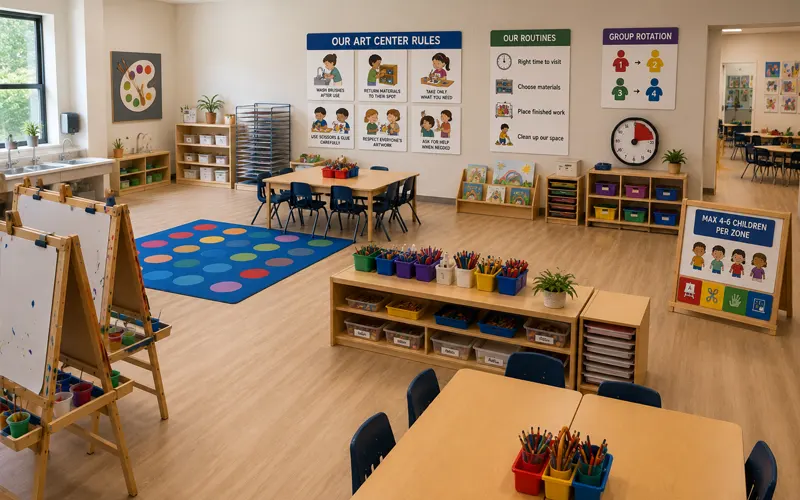
Step 5: Establish Rules and Routines In Your Art Center
Lastly, make sure your art gallery has a written, clear, and simple set of rules. It will help children use the art center independently and respectfully. Examples of these rules include:
- Wash brushes after use
- Ensure you return materials to their labelled spot after use
- Take only what you need
- Use scissors and glue carefully
- Respect everyone’s artwork
- Ask for help when needed
Additionally, you need to create awareness for children to know the following:
- The right time they can visit the art center
- Best ways to choose materials
- How and where to place their finished work
- How to clean up their space
Research suggests that giving children visual instructions makes young children complete tasks independently when there is a clearer expectation and minimal need for frequent verbal prompts.
Therefore, if your art center classroom setup contains more than 12-15 children, make sure you display about 5 or fewer pictures that clearly indicate the rules of the art center. Place these rules at the entrance to the middle of the art center classroom instead of a long text list.
Also, ensure you limit the number of children in each activity zone to about 4-6 children. For the visual timer, make it around 5-10 minutes at busy periods to rotate groups. This way, there will be no overcrowding. Plus, every child will have equal access to materials without constant teacher intervention.
Mistakes to Avoid When Purchasing Furniture for Setting Up Your Art Center
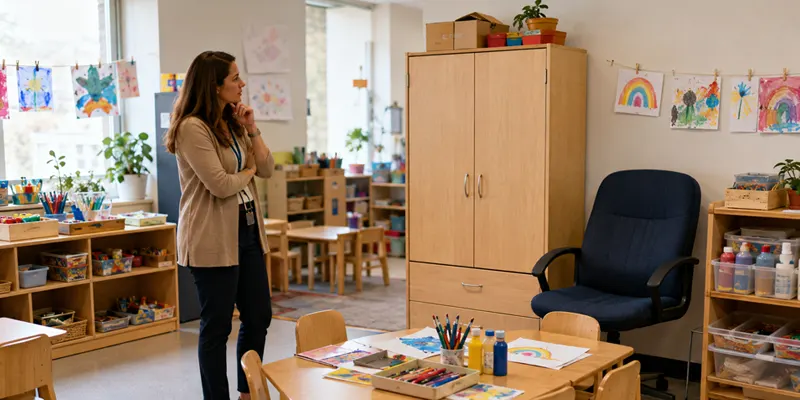
Regardless of your passion for art, you might make mistakes when you are purchasing furniture for launching your art center. Being aware of these mistakes in advance will save you cost, time, setbacks, and help you build a lasting success.
- Choosing Furniture Based On Price: Don’t just choose a supplier because they offer a low quotation. Always ensure you know the cost per student workstation when you’re comparing bids from multiple suppliers instead of comparing the total price of the project. For instance, supplier A may charge $12,000 for furniture that serves 30 children, while supplier B charges $13,500 for furniture that accommodates 40 children with the same classroom footprint. Breaking down costs per workstation is always more accurate to measure long-term value, rather than comparing just quotations.
- Ignoring Safety Standards: Don’t just verify whether a product is non-toxic while overlooking the supplier’s documentation. Before you approve a purchase, make sure the supplier presents their product test certification, like BIFMA X5.1 or ASTM F2057. For compliance certification, request GREENGUARD Gold Certification or FSC Chain of Custody Certification, and cleaning instructions. This way, you will have a simplified future inspection that reinforces your compliance during licensing or accreditation reviews.
- Using Inferior Furniture: Don’t purchase furniture without confirming the level of quality the supplier offers. It’s recommended that, if you want to purchase 50 tables or more, you first request one complete sample set that consists of a table, chair, and storage unit. Then, allow teachers to use the furniture for about two to four weeks under normal class conditions. This way, you will easily detect issues like unstable joints, hard-to-clean surfaces, or weak drawer runners, if there’s, before you decide whether to purchase from the manufacturer or not.
- Not Having Enough Storage: Don’t plan your storage based on your opening-day inventory. We recommend that you reserve around 20-30% of your storage capacities in case of future supplies, seasonal craft materials, and donated resources. This means you should plan a space for 12 or 13 cabinets, even if your art center requires just 10 storage cabinets today. This will save you the cost of renovation when your classroom activities or enrollment increase.
- Choosing Non-befitting Furniture: Don’t order furniture first, then test the art center classroom layout later. Before you place your order, first use masking tape to mark the proposed area where you want to place the table and storage location. Ask two or more teachers to simulate a normal art session by walking between activity zones. This walkthrough will help you identify if there are crowded corners, blocked walkways, or problems with the storage access before you place an order.
Tips For Keeping Your Art Center Ideas Fresh After Setting Up
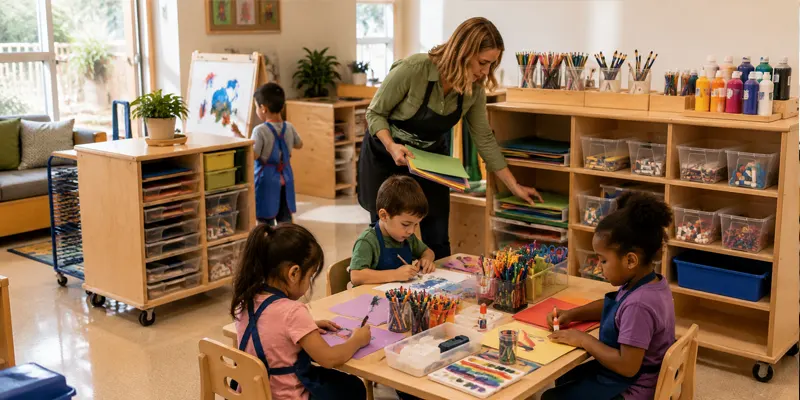
Setting up and launching your art center is the beginning; ensuring your art center maintains its momentum over time is just as important. The list below shows the tips for keeping your art center ideas fresh every time:
- Refresh Learning Materials Instead of Replacing Furniture: You don’t have to replace furniture every school year; instead, rotate 25-30% of your consumable materials every 6-8 weeks. For instance, you can replace standard drawing paper with textured paper. Replace crayons with watercolor activities. This makes children find art activities interesting without you incurring additional furniture or equipment costs.
- Review the Furniture and Storage Annually: Make a comparison between the number of enrolled students and your art center classroom capacity at the end of every academic year. If you have more than a 10-15% increase, verify if the drying racks, easels, storage cabinets, and workstations can cater to the needs of the newly enrolled students before the new term begins. Planning a purchase often guarantees lower costs while minimizing last-minute procurement delays.
- Choose Modular Furniture for Flexibility: If children use your art center for painting in the morning and STEM or sensory activities in the afternoon, choose mobile storage cabinets with lockable wheels and folding or nesting activity tables. This gives you the chance to quickly reconfigure the room in 10-15 minutes without changing the position of any heavy furniture. This guarantees an increase in how children utilize the classroom while reducing the need for dedicated activity rooms.
- Establish a maintenance schedule: At the beginning of every school term and mid-term, make sure you inspect your art center classroom furniture. Check the stability of table legs, if caster wheels roll freely, drawer runners operate smoothly, and laminate surfaces are not peeling. You tend to reduce the likelihood of safety risks and larger repair costs when you identify and repair minor defects before they become serious.
- Monitor Material Usage: Track how much the children consume supplies like drawing paper, glue sticks, washable tempera paints, and crayons monthly. If you realize that children in your art center normally use above 80% of its monthly supply before the third week, you need to establish a minimum stock level or increase your reorder level. Doing this saves you the cost associated with emergency purchases, gives your art center a smooth operation, and makes it easier for you to make more accurate purchase forecasts.
FAQs
What Licenses Are Required Before You Can Set Up An Art Center?
The licenses required before you can set up an art center depend on your country, state, or local government. Meanwhile, in most cases, you may require some or all of the following, especially in children’s art centers:
- Business License
- Childcare or Education License
- Health and Safety Permit:
- Fire Safety Certificate
- Building Occupancy Permit:
- Public Liability Insurance:
While all these are the licenses you may require before setting up an art center, you must contact your business registration office. This way, you can be assured about the exact license and permits you need to set up an art center in your location.
How Much Space Do You Need To Setup An Art Center In a Classroom?
Setting up an art center in a classroom does not have a fixed size requirement. The factors that determine the space you need are the number of children, available furniture, and planned activities. Meanwhile, you can refer to the list below as a general guide:
- Small classroom: Reserve about 30–50 square feet (2.8–4.6 m²) for 2–4 children.
- Medium classroom: Allocate 50–80 square feet (4.6–7.4 m²) for 4–6 children.
- Large classroom: Set aside 80–120 square feet (7.4–11.1 m²) or more for 6–8 children.
What Is The Total Cost Of Furnishing An Art Center For a Single Classroom?
The total cost of furnishing an art center for a single classroom typically costs between $5,000 and $15,000. The actual price depends on the quantity and quality of the furniture, the number of children, and your choice of art materials.
Can I Purchase Art Center Furniture In Bulk For Various Locations?
Yes, you can purchase art center furniture in bulk for various locations from preschool furniture suppliers/manufacturers who offer bulk purchasing for schools, wholesalers, and chain kindergartens.
Do I Need To Design The Art Centers Of Toddlers and Preschoolers Differently?
Yes, you need to design the art centers for toddlers and preschoolers differently. This is because both have different developmental needs. Therefore, you should design their art centers differently for safe and age-appropriate learning.
Conclusion
Having a well-designed art center is a long-term investment for you. When you choose durable furniture and have properly planned and efficient learning zones, you will have a safe and engaging environment for children while also improving the long term value of your investment.
Meanwhile, if you are looking for an expert who can offer a thoughtfully-designed complete art center setup, Westshoregroups is your guaranteed reliable partner. At Westshoregroups, we offer custom preschool furniture, efficient art layouts, child-safe storage solutions, etc. We don’t just help you build art centers, we build a creative environment that serve you for many years.