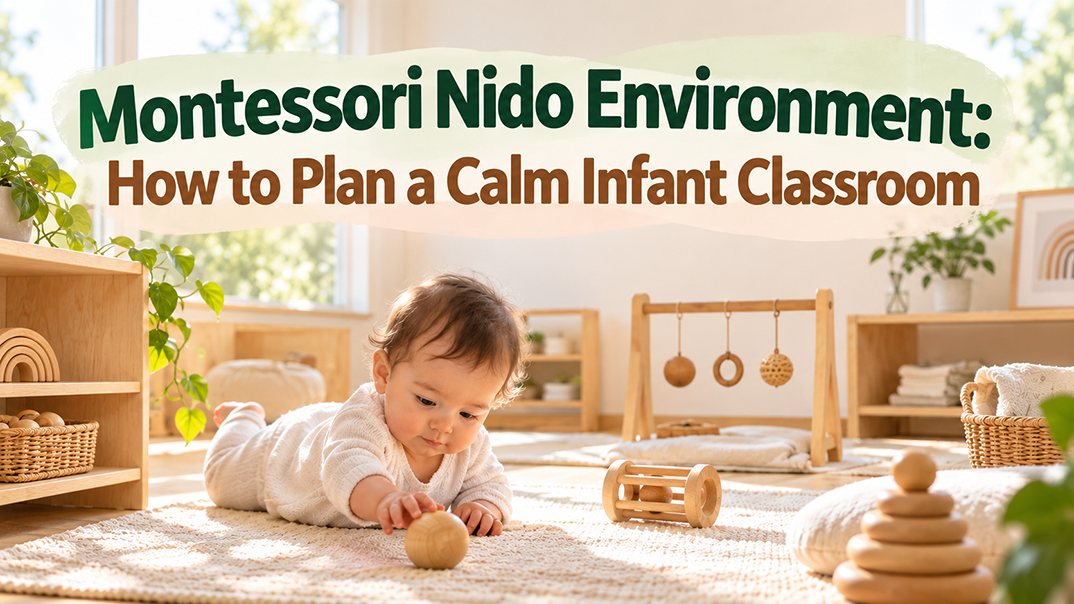
If you are planning a Montessori Nido environment, start with how infants and adults will move through the room. Then assign activity zones, choose furniture that keeps the space visible, and select materials for the abilities your group has now. This order gives infants room to move, rest, observe, and receive care while giving adults a clear and practical way to supervise the room.
What Should a Montessori Nido Environment Help Infants Do?
What Should a Montessori Nido Environment Help Infants Do?
A Montessori Nido environment should help infants feel safe, move freely, explore their surroundings, and develop early independence. As the American Montessori Society explains, a well-prepared infant classroom encourages natural development through movement, exploration, and discovery.
A well-designed Nido environment supports five key areas:
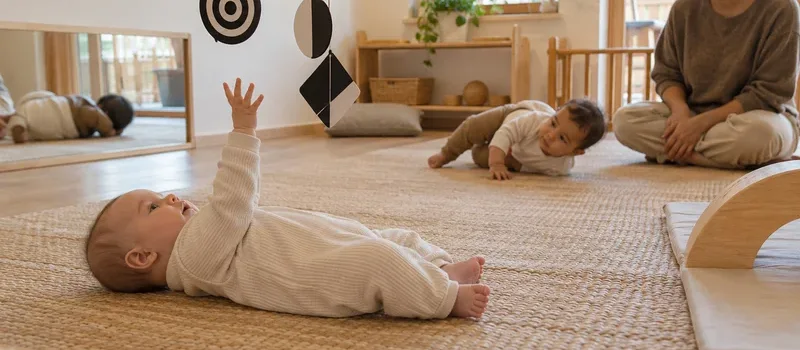
- Move Freely and Develop Motor Skills : Open floor space, soft mats, low mirrors, and sturdy support bars allow infants to practice rolling, crawling, sitting, and standing at their own pace.
- Explore Through Their Senses : Simple materials with different textures, shapes, and sounds encourage babies to explore through touch, sight, and hearing without overwhelming them.
- Build Early Independence : Placing a few age-appropriate toys within reach allows infants to make simple choices, grasp objects, and explore independently under supervision.
- Feel Safe and Emotionally Secure : Predictable routines, gentle lighting, and responsive caregivers help infants feel comfortable and confident in their surroundings.
- Develop Focus and Curiosity : An uncluttered classroom with carefully selected materials reduces distractions and gives infants time to observe, investigate, and concentrate.
The goal of a Montessori Nido is not to accelerate development, but to give every infant the freedom, security, and support to grow at their own pace.
How to Plan Four Functional Areas in a Montessori Nido Classroom
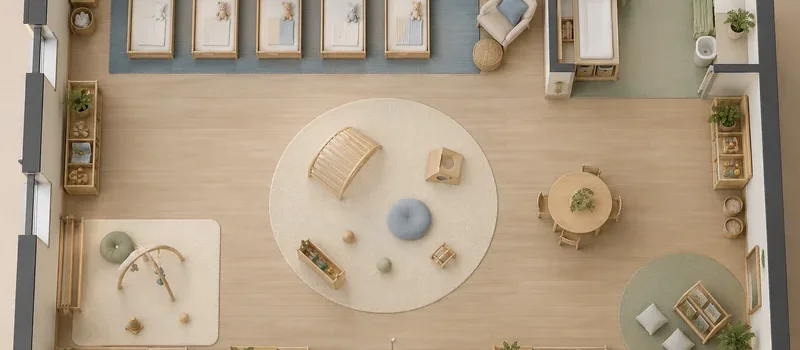
A Montessori Nido classroom should have four functional areas for movement, sleep, daily care, and exploration. Plan each area based on the room size, number of infants, developmental stages, and local licensing requirements. Keep the layout open, easy to supervise, and practical for daily routines.
Floor Activity Area
Give infants the largest open floor space for rolling, crawling, reaching, and pulling themselves up. Use stable, easy-to-clean mats and keep larger furniture along the walls. A securely installed low mirror or pull-up bar can support movement, while clear sightlines help teachers supervise safely.
Sleep Area
Choose a quiet location away from busy activity routes but within caregivers’ view. Use sleep equipment that meets local regulations and infant safe-sleep requirements. Keep lighting gentle, distractions minimal, and bedding storage accessible to staff.
Care and Feeding Area
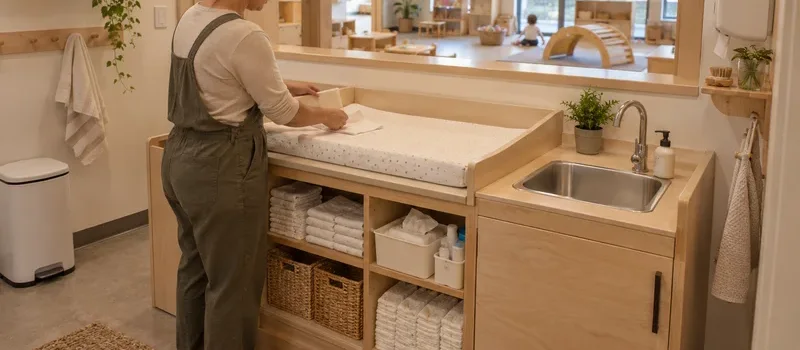
Arrange changing surfaces, handwashing facilities, supplies, and waste disposal close together to simplify daily routines. Keep essential items within adult reach and hazardous materials securely away from infants. The layout should allow caregivers to complete care tasks without leaving an infant unattended.
Materials and Observation Area
Place a few age-appropriate materials within infants’ sight and reach. Use low, stable shelves as children become mobile, and avoid overcrowded displays. Rotate materials according to developmental needs to encourage exploration and maintain a calm environment.
Before finalizing the layout, check that caregivers can supervise all four areas and move between them without disrupting infants’ activities or rest.ut crossing through active infant work? This check should confirm the zoning, not replace it.
How to Choose Furniture for a Montessori Nido
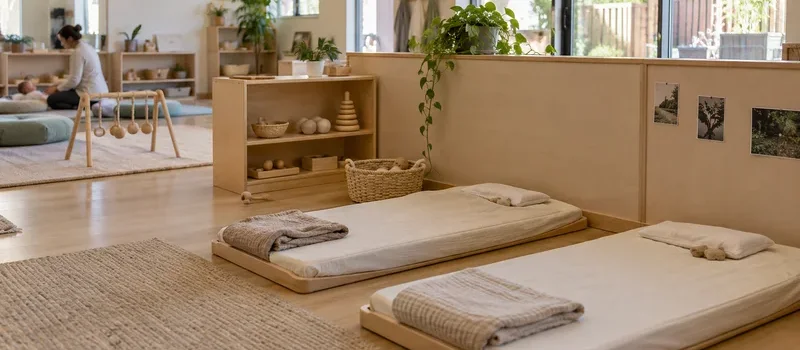
Choose furniture by asking how it will support movement, care, visibility, and the daily work of your staff. Before you compare product styles, check five things: height, stability, cleanable surfaces, access for adults, and fit with the room’s changing needs.
Choose low storage that keeps the room visible
Low storage lets infants see a small selection of materials and lets you keep an open sightline across the room. Use a low shelf against a wall when you need storage without a visual barrier. If the unit will sit in the room as a boundary, compare an open or translucent back with a closed back. An open sweep shelf is one example to review, but the right choice depends on the shelf height, room dimensions, and the direction of movement around it.
Choose surfaces and joints that suit infant-room use
Infant furniture is touched, mouthed, wiped, and moved throughout the day. Choose durable surfaces with edges and joints that you can inspect easily. Avoid details that create hard-to-see gaps or make routine cleaning difficult. You should also be able to move or access the furniture when the room needs a deeper clean or a safety check.
Choose stable furniture that matches the children’s mobility
As infants begin to pull up, they test the stability of anything they can reach. Choose shelves, mirrors, bars, and dividers that can be secured as required and that will not become easy tipping points. Keep heavier storage low and keep the area around pull-up furniture open enough for a child to lose balance safely.
Choose care furniture that shortens staff movement
Place the changing table, sink, supplies, and waste route where the adult can complete care without crossing the movement zone. Choose storage that holds the routine’s everyday items while keeping restricted items secure. The best care furniture is the piece that makes the sequence easier to complete and easier to supervise.
Choose furniture that can change with the group
Do not furnish a non-mobile infant room like a toddler classroom. Add tables, chairs, book displays, and practical-life units when the children and daily routine need them. If your centre serves more than one age group, decide which furniture belongs in each stage and how you will move or replace it as the group develops.
Which Montessori Materials Should You Choose at Each Developmental Stage?
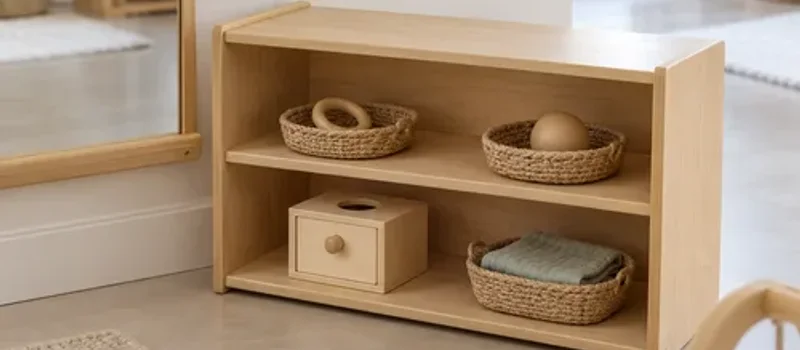
Choose materials according to what the infants in your room are ready to practise. You do not need a full shelf on the first day. Start with a small selection, present each object clearly, and add or rotate materials when you observe a new ability or a repeated interest.
| Developmental focus | Materials to consider | How to choose and present them |
|---|---|---|
| Visual attention | High-contrast mobiles, simple suspended objects, and a Baby Gobbi mobile | Choose one clear visual experience and place it where the infant can look comfortably without competing displays. |
| Grasping and oral exploration | Grasping rings, teething rings, rattles, and other easy-to-hold objects | Choose a safe size and simple shape that fits the child’s current hand control. Present one or two objects so the infant can focus on the action. |
| Reaching and rolling | Ball trackers, rolling objects, bells, and materials that invite the child to follow movement | Place the object within a realistic reach or just beyond it, so the infant has a reason to extend, turn, or move without becoming frustrated. |
| Object permanence and cause and effect | Object permanence boxes, boxes with a ball, and simple placing or dropping work | Introduce these when the child can sit or handle the action. Demonstrate slowly, then give the child time to repeat it. |
| Early coordination and shape work | Simple shape work, large knobs, and basic coordination materials for sitting or standing children | Choose one clear action at a time and check that the material matches the child’s grip, balance, and attention span. |
For another school-focused overview of infant-toddler classroom practice, you can also review this Montessori infant-toddler program guide when comparing routines, room preparation, and material rotation.
Use your observations to decide what stays on the shelf. If an infant repeatedly reaches for a rolling object, you can offer a related challenge before adding a completely new category. Remove damaged or unsafe items immediately, and follow your program’s procedure for checking objects that infants mouth.
Design Safety and Hygiene Into Every Nido Zone
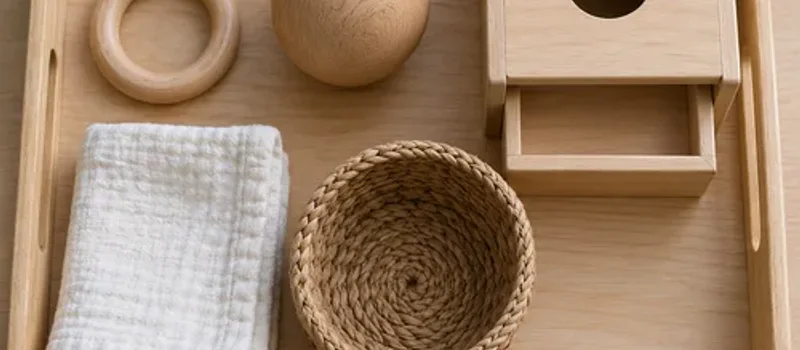
Safety and hygiene should be part of the room design from the beginning. A safe Nido gives you clear sightlines, short care routes, stable furniture, and a simple way to remove anything that becomes unsafe during the day.
Keep sightlines and reach paths open
Stand in the positions where you will supervise, sit with an infant, and complete care. Check whether shelves, dividers, or displays block your view. Keep the route between the movement, sleep, and care zones wide enough for an adult carrying an infant.
Secure furniture and check the infant’s point of view
Secure furniture to the wall when required, keep heavy items low, and inspect the area under and behind every unit. Look for reachable cords, loose parts, sharp edges, unstable baskets, and gaps that an infant could explore. Check the room at floor level, not only from an adult’s standing height.
Separate care supplies, clean items, and waste
Keep clean supplies close to the adult and keep cleaning products, disposable items, and waste out of the infant’s reach. Plan where used materials will go during the day so they do not return to the shelf before they are ready for use.
Confirm sleep and supervision requirements before installation
Rules for sleep equipment, crib use, staff-to-child ratios, cleaning products, and room dimensions vary by jurisdiction. Confirm current requirements with your local licensing or regulatory authority before you order or install the room. A product that works in one early-learning setting may need a different arrangement under your local rules.
Build a daily inspection into the routine
Check fasteners, finishes, mats, shelves, small parts, and room routes during the day. Give your team a clear response when a material is damaged, wet, heavily used, or no longer suitable for the group. Removing one item is better than leaving a complete-looking display that creates a risk.
A Clear Eight-Step Process for Planning Your Montessori Nido
Follow the steps in this order so that your room plan develops from the children’s needs and daily routines instead of from a product catalogue.
- Define the group : Record the expected age range, number of infants, mobility stages, staff positions, and daily activities.
- Record fixed conditions : Mark doors, windows, sinks, plumbing, storage, heating, exits, and any local licensing limits that affect the room.
- Map movement paths : Trace the routes for arrival, care, feeding, sleep checks, material rotation, cleaning, and emergency access.
- Reserve the four zones : Mark the movement, sleep, care, and materials areas before you place large furniture.
- Place essential furniture : Test the changing area, sleep furniture, low storage, mirrors, and boundaries against the routes and sightlines.
- Choose furniture by function : Compare height, stability, cleanable surfaces, staff access, storage capacity, and how each piece will work as the group develops.
- Select materials by ability : Start with a small set of mobiles, grasping objects, rolling materials, object-permanence work, or early coordination materials that match your observations.
- Install, inspect, and adjust : Walk through the room at infant level, complete a staff safety check, observe the group using the space, and change the layout when the children’s needs change.
This sequence helps you protect the movement area, avoid unnecessary purchases, and make each furniture decision easier to explain. It also gives your team a shared way to review the room after it is in use.
FAQs
1. What age is a Montessori Nido for?
A Nido generally serves infants who are not yet walking confidently. Many programs use a range from birth to around 18 months, but the move to an Infant Community is usually based on development and walking ability as well as age.
2. Does every Nido need floor beds?
No single sleep arrangement fits every program. You may use individual floor beds or mats, or you may need cribs because of local requirements or program practice. Confirm the rules that apply to your location and choose sleep furniture that staff can supervise safely.
3. Should you place tables and chairs in a Nido?
Tables and chairs are not the starting point for a non-mobile infant room. Add them when your group is ready for seated activities, meals, or practical routines and when the furniture will not reduce the movement space younger infants need.
4. How many materials should you make available?
Offer enough materials to give your group meaningful choices, but keep the display small enough for infants and adults to use. A focused selection that matches current abilities is usually more useful than a full shelf that no one can navigate.
5. How should you handle materials that infants mouth?
Choose materials that are appropriately sized and suitable for your program, then follow your hygiene procedure for checking and removing objects during the day. Remove anything damaged or unsafe immediately.
Conclusion
Your Montessori Nido environment should make infant movement, rest, care, and observation easier. Start by mapping the movement paths and activity zones, then choose furniture that protects sightlines and select materials that match the children’s current abilities. Review the room after it is in use and adjust it as the group develops.
If you need help turning a floor plan into a practical infant room, West Shore can review your space, match furniture and Montessori materials to each zone, and help you build a setup that works for your daily routines. You can learn more about our classroom design support before you finalise your plan.