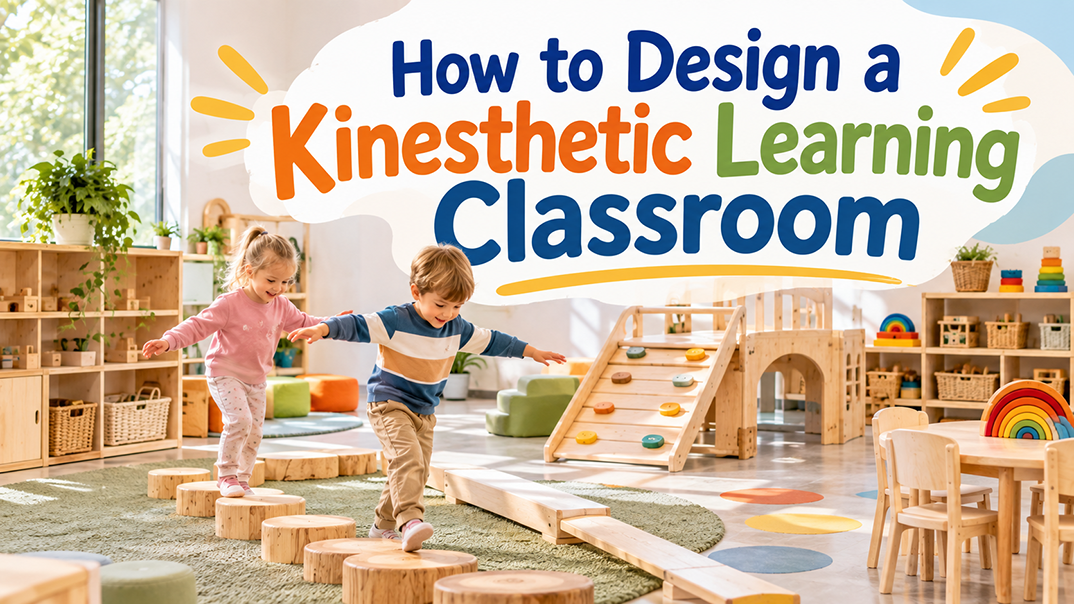
A well-designed kinesthetic learning classroom is important because the space itself affects how preschoolers move, explore, use materials, and take part in hands-on learning.
This guide explains how to design a kinesthetic learning classroom for preschoolers, covering classroom zones, circulation, furniture, storage, learning materials, lighting, color, supervision, and safety. We hope this helps you when designing a kinesthetic classroom.
What Is a Kinesthetic Learning Classroom?
Kinesthetic learning uses movement, touch, and hands-on action as part of learning. Children may carry and sort objects to compare quantity, build with blocks to explore shape and structure, or scoop and pour materials to understand volume.
Current research does not support matching teaching methods to fixed “learning styles.” A more useful classroom approach is to give children several ways to participate through seeing, listening, touching, moving, and doing. Appropriate physical activity can also support executive functions such as inhibitory control, working memory, and cognitive flexibility in preschool children.
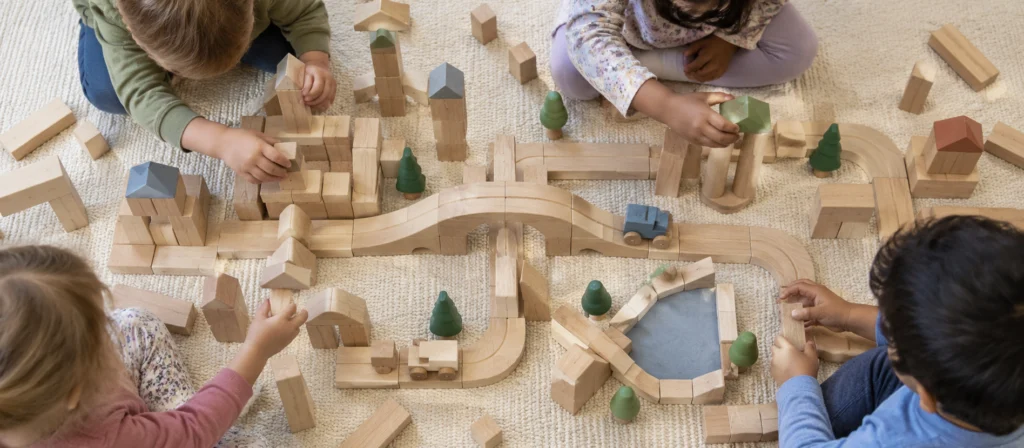
How to Divide Areas When You Design a Kinesthetic Learning Classroom?
Start With Room and Activity Requirements
Before you divide the room into zones, collect the information that will control the layout. This step helps you avoid choosing furniture or equipment that later reduces circulation, blocks storage, or does not fit the age group.
| Planning Variable | What You Need to Confirm | Design Impact |
| Class size | How many children may use each area at the same time? | Sets zone capacity, circulation needs, and storage quantity. |
| Age group | What are the children’s body size, movement skills, and level of independence? | Affects furniture height, equipment difficulty, and material reach. |
| Room dimensions | What are the length, width, ceiling height, doors, windows, columns, sinks, and power locations? | Controls the number of zones, equipment size, and movement routes. |
| Activity frequency | Which areas are used every day and which can rotate? | Helps you decide what should stay fixed and what can be movable. |
| Cleaning conditions | Where are the water source, drainage, and easy-clean surfaces? | Affects sensory, art, and messy-play placement. |
| Target market | Which local safety or product requirements apply to the project? | Helps you confirm suitable materials, product documents, and testing scope before ordering. |
Use Existing Classroom Zones to Support Kinesthetic Learning
You do not need to create a separate kinesthetic learning zone. Many areas in a preschool classroom already support movement, hands-on work, and active exploration. The key is to look at how children use each area and make sure they have enough space, materials, and freedom to move.
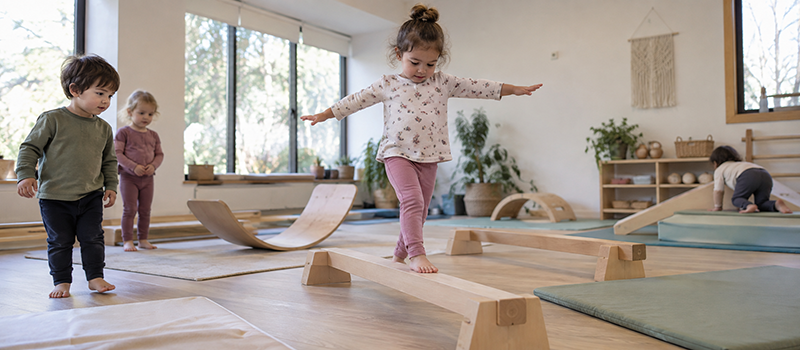
• Gross Motor Area: This is already a natural kinesthetic learning space. Children can balance, crawl, step, move to music, and complete simple obstacle activities.
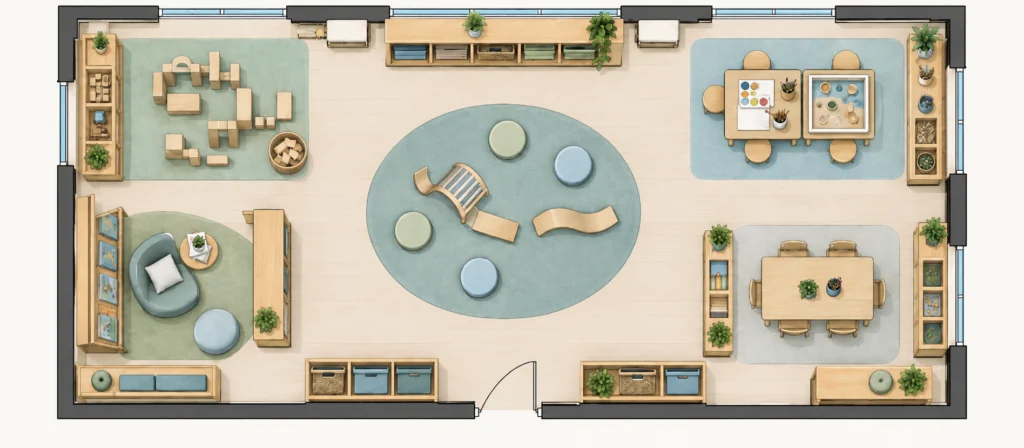
• Block and Construction Area: Building, carrying, stacking, and connecting blocks all involve movement and hands-on problem-solving. Make sure children have enough floor space to work around larger structures.
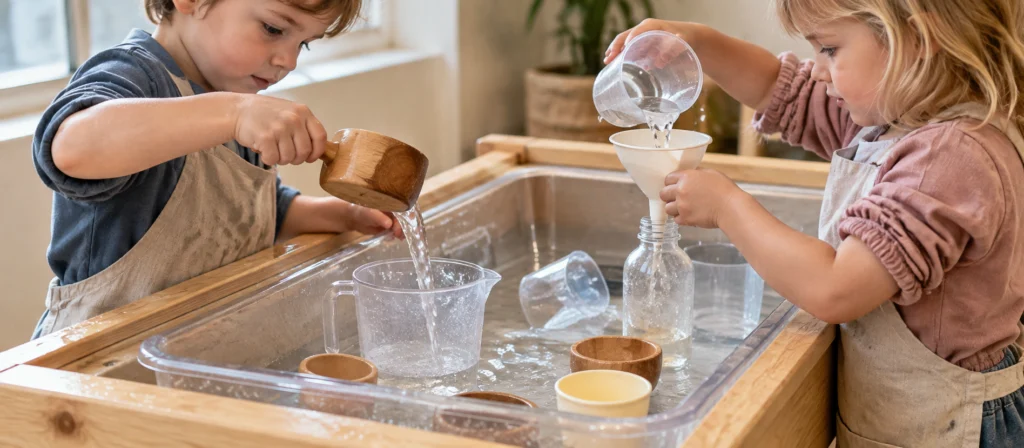
• Sensory and Art Area: Pouring, scooping, painting, molding, and working at vertical surfaces give children many ways to learn through touch and movement.
• Dramatic Play Area: Children naturally move, carry props, imitate real-life actions, and interact with others. This makes dramatic play another strong area for kinesthetic learning.
• Fine Motor Area: Puzzles, threading, sorting, transferring, and connecting activities support smaller hand movements and coordination. Keep materials easy to reach and tables stable.
• Reading and Quiet Area: This area does not need to become highly active, but you can still include simple movement, such as acting out parts of a story or using hands-on story props.
If some parts of your classroom are mostly passive, you can add small kinesthetic elements instead of creating a completely new area. A basket of loose parts, a simple movement game, a floor activity, or a few hands-on materials may be enough to give children more ways to move and learn.
How to Plan Classroom Lighting and Color?
A kinesthetic learning classroom does not need the same lighting and colors in every area. Children use different spaces for movement, building, art, reading, and fine motor activities, so lighting and color should match how each area is used.
| Area | Lighting | Color | Design Focus |
|---|---|---|---|
| Gross Motor Area | Bright, even lighting | Soft green, light blue, warm white | Keep the space clear and easy to move through. |
| Block Area | Natural or clear ambient light | Natural wood, beige, warm white | Reduce visual distractions and keep structures easy to see. |
| Sensory and Art Area | Bright, stable lighting | Warm white, light beige, natural wood | Make colors and materials clear while reducing glare. |
| Dramatic Play Area | Soft, even lighting | Soft warm tones and natural colors | Create a comfortable setting without too much decoration. |
| Fine Motor Area | Clear task lighting | Soft neutrals, light green, light blue | Help children see small materials and details clearly. |
| Reading Area | Soft but clear lighting | Soft green, blue, beige, or wood tones | Create a calm space with less visual stimulation. |
Use natural light when possible, but avoid strong direct sunlight that can create glare or make part of the room too warm. Before placing reading, art, or fine motor areas, check how the light changes during the day.
For colors, keep the main background simple. Warm white, beige, and natural wood work well, with one or two soft accent colors added through rugs, furniture, labels, or wall details. This helps define different areas without making the classroom feel too busy. color theme. This keeps the classroom easier to read visually and leaves enough space for toys, learning materials, and children’s work without making the room feel crowded or overstimulating.
How to Choose Furniture, Equipment, and Learning Materials?
Choose Furniture That Supports Children’s Activities and Independent Use
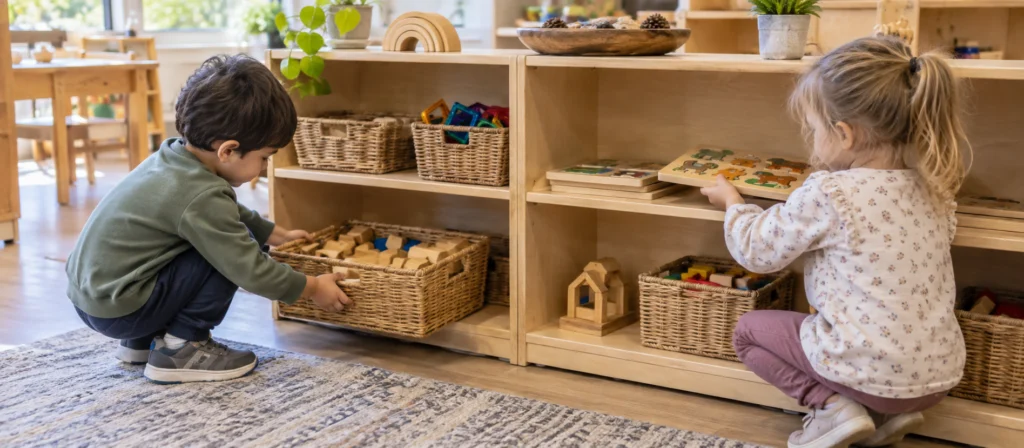
It is best to choose furniture after the basic layout has been established. This allows you to select sizes according to the area available, the number of children, and how the furniture will be used, instead of discovering after delivery that the open activity space has become too crowded.
When choosing furniture, focus on the following points:
- Is the size appropriate for children? Tables, chairs, cabinets, and work surfaces should be selected according to the age group, and materials children use frequently should be placed where they can easily see and reach them.
- Does it support independent use? Open low shelves, child-height storage, and easy-to-use furniture make it easier for children to collect, use, and return materials on their own.
- Can the space be adjusted easily? Movable tables and chairs, storage units with locking casters, modular furniture, and multi-purpose platforms are better suited to a kinesthetic learning classroom that changes frequently.
- Is enough activity space left around the furniture? Do not look only at the dimensions of the furniture itself. You also need to allow room for children to stand up, turn, carry materials, and use the furniture at the same time.
- Is it stable, durable, and easy to maintain? Classroom furniture is used heavily every day, so edges, joints, surface finishes, hardware, and cleaning requirements should all be checked in advance.
Select Equipment and Learning Materials for Different Types of Activities
For equipment and materials, start with the question, “What do you want children to do?” This makes it easier to control the quantity you buy and to understand the real purpose of each item in the classroom than simply purchasing large amounts by toy category.
| Activity Type | Suggested Equipment and Materials | Main Activities Supported |
|---|---|---|
| Gross Motor Activities | Soft Climbing and Tunnel Set, balance equipment, stepping equipment, movement mats | Climbing, stepping, crawling through, balancing, body coordination |
| Block and Construction | Wooden Blocks in Different Shapes, Loose Parts, connecting construction materials | Carrying, stacking, balancing, connecting, rebuilding, spatial exploration |
| Sensory Exploration | Sensory tables, sand and water materials, Scooping and Pouring Tools, clay | Scooping, pouring, grasping, filling, transferring, tactile exploration |
| Fine Motor Activities | Puzzles, threading toys, connecting materials, sorting toys, grasping tools | Grasping, rotating, inserting, sorting, hand-eye coordination |
| Art Activities | Easels, drawing and painting tools, collage materials, clay, craft materials | Drawing, cutting, pasting, shaping, two-handed work |
| Dramatic Play | Play kitchens, shop furniture, everyday props, role-play materials | Opening, carrying, organizing, placing, cooperating, imaginative play |
You do not need to buy every type of material. Start with the activities used most often in your curriculum, then decide the quantity and range of equipment you need. Open-ended materials that support different movements and ways of playing can usually continue to be used as children’s abilities and the curriculum change.
How to Design a Safe Environment for Movement?
Keep Movement Paths Clear and Separate Conflicting Activities
Keep the main routes between the entrance, activity areas, storage, sinks, and exits clear. Avoid placing tables, cabinets, or loose materials where children frequently walk.
Place high-movement areas, such as gross motor and dramatic play, away from quieter spaces like reading and fine motor work. Low shelves, rugs, or extra spacing can create simple boundaries without blocking supervision.
After arranging the room, walk through the main routes as a child would. If chairs, materials, or groups of children make a pathway feel crowded, adjust the layout.
Leave Enough Space Around Activity Equipment
Do not plan equipment based only on its footprint. Children also need room to approach, use, turn around, and leave safely. Keep active equipment from being placed too close together, especially where entry and exit paths may overlap.
Flooring should match the activity. General areas need level, slip-resistant surfaces, while climbing, jumping, or balance areas may require impact-absorbing flooring based on equipment height and local safety requirements.
Maintain Clear Teacher Sightlines
Teachers should be able to see the main activity areas from common positions such as the entrance, work tables, and sink area. Avoid placing tall cabinets or enclosed furniture where they create blind spots.
Use low furniture to divide zones when possible, and place taller storage units against walls. The goal is not to keep the classroom completely open, but to make supervision easy during normal daily movement.
FAQs
1. Can You Design a Kinesthetic Learning Classroom in a Small Space?
Yes, small spaces can certainly accommodate kinesthetic learning; the key is to avoid letting fixed furniture fill the entire classroom. You can utilize movable tables and chairs, wall-based activities, and multi-purpose open areas to allow the same space to serve different functions at different times. Additionally, consider rotating your teaching aids and materials rather than displaying everything at once. This approach ensures children have ample room to move while preventing the classroom from feeling cluttered.
2. How Should a Kinesthetic Classroom Change for Different Age Groups?
You need to adjust the space based on the children’s age, physical abilities, and level of independence. For younger children, furniture and materials should be low and simple, with more open space for movement; as they get older, you can introduce more complex tasks involving balance, construction, collaboration, and fine motor skills.
3. How can a kinesthetic classroom be made inclusive for children with disabilities and varying abilities?
You can design activities that offer multiple ways to participate, rather than requiring every child to perform the exact same movements. For instance, a single activity might be adapted for seated, standing, floor-based, or tabletop engagement, enabling participation by children who use wheelchairs, have limited mobility, or possess varying levels of physical coordination.
In terms of spatial layout, ensure there are sufficiently wide aisles and turning spaces, and keep frequently used materials within easy reach. Features such as work surfaces at varying heights, adjustable furniture, clear visual or tactile cues, and designated quiet areas can also help children with specific visual, auditory, sensory, or mobility needs navigate and use the classroom more naturally.The goal is not to create a separate “special area,” but to ensure that the primary learning spaces themselves are accessible and usable by a wider range of children.
4. How Can You Prevent a Kinesthetic Classroom From Becoming Overstimulating?
You can manage the number of colors, materials, sounds, and activities present simultaneously to avoid overwhelming children with too much stimulation at once. High-activity zones and quiet areas should be spaced appropriately, and toys or teaching aids can be rotated rather than all being displayed at the same time.
It is also advisable to maintain a relatively quiet area where children can read, spend time alone, or take a short break when needed. If you notice children becoming easily distracted, excessive noise between zones, or difficulty transitioning from active to quiet activities, you should reduce the materials, adjust the layout, or lower the level of environmental stimulation.
5. How Do You Know If a Kinesthetic Classroom Layout Is Working?
Watch how children use it. If they can move easily, find materials, stay engaged, and switch between activities without frequent congestion, the layout is working well.
Conclusion
A well-designed kinesthetic learning classroom should provide children with ample space to move, explore, and manipulate materials, while remaining organized, uncluttered, and easy to manage. Planning requires integrating factors such as the physical space, the children’s ages, activity requirements, traffic flow, teacher sightlines, and safety standards when arranging the various zones.
For a comprehensive preschool classroom project, the layout, furniture, and learning materials should be considered holistically. Incorporating these elements into a unified plan from the outset makes it easier to identify issues regarding dimensions, quantities, and spatial usage, thereby minimizing the need for later adjustments. Should you wish to further refine your plan, we can provide support with layout design and product configuration tailored to the specific conditions of the room.